Polishing Animations
|
Good morning readers, last week I went through how to make an animation from start to finish. This post will build on from that post, therefore it might be a good idea to read my previous blog entry – Animating using Anima2D in Unity. This week is the polishing of animations and implementing them into the game. Originally I had no prior knowledge how to actually make the animations from a technical perspective or how they affect each other. I asked my coder and designer how I should make the animations, but back then they didn’t know either, up until a few days ago during the code supervision with Håkan. I get the message “FASS YOUR ANIMATION IS BROKEN” , shortly after they storm into the room starting to draw on the whiteboard. “WE NEED THIS” they said and pointed at this triangle. 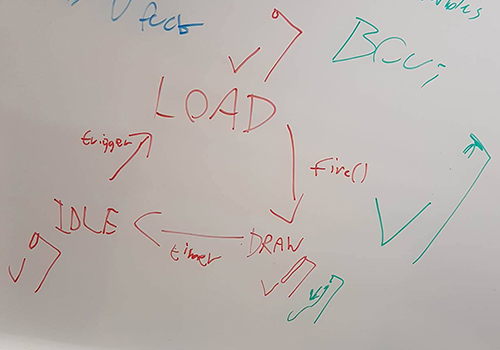 Once I was aware of the technical limitations it was rather easy fixing it. Unfortunately, I was unable to make much use of the old poses, which means I wasted around two hours. This forced me to make new poses and making sure they would all work well together. The way the animations had to work was like this – it starts with idle (only affecting the legs) into Fire into Draw and then it repeats. To visualise it better here is a picture of the different poses I had to make for the animations. In order to make it seemingless you need to have the last keyframe as the first keyframe for the new animation, which also means the “Fire Keyframe 1” is having the same pose with its arm as the Idle animation only moving the legs. 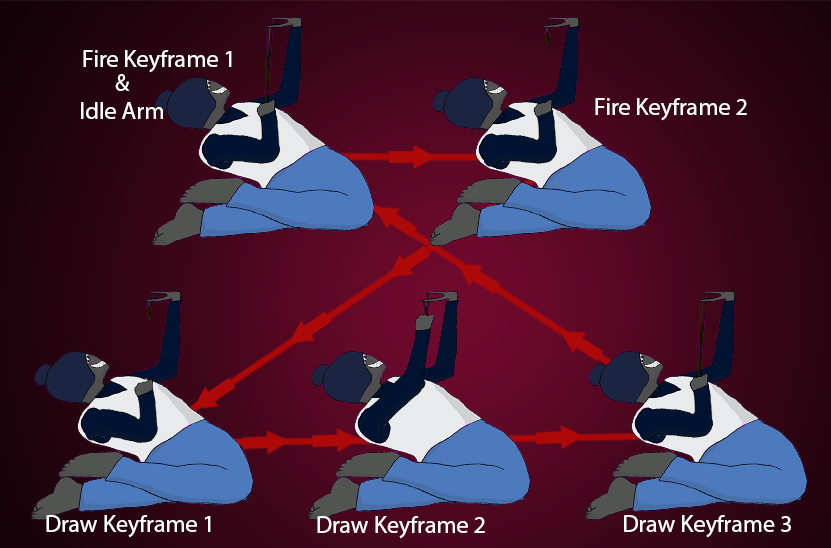 With that said it ends my work of this asset, the work remaining is to implement the triggers for when the enemy is supposed to shoot. Which is outside my area of expertise as a Project Manager acting as the producer in the team. As the project’s deadline is on Thursday 16th of March I’m not sure if there will be any blog entries in the following weeks. |