Big Game Project Week Two
|
After last week’s skeleton placement the time has come to enable a intuitive control over said skeleton. It would be very cumbersome to be forces to animate every bone in the character by hand.
I used what is called NURBS curves in Autodesk Maya to enable me to circumvent this problem and create Control objects for the skeleton rig, using tutorials online and a book I found called the art of rigging. I found this site particularly insightful: https://courses.cs.washington.edu/courses/cse460/05sp/links/Rigging/basic_character.html While not rigging a humanoid character the basic principle is the same.
Placing the control objects to correspond with the part of the skeleton that I want to control it.
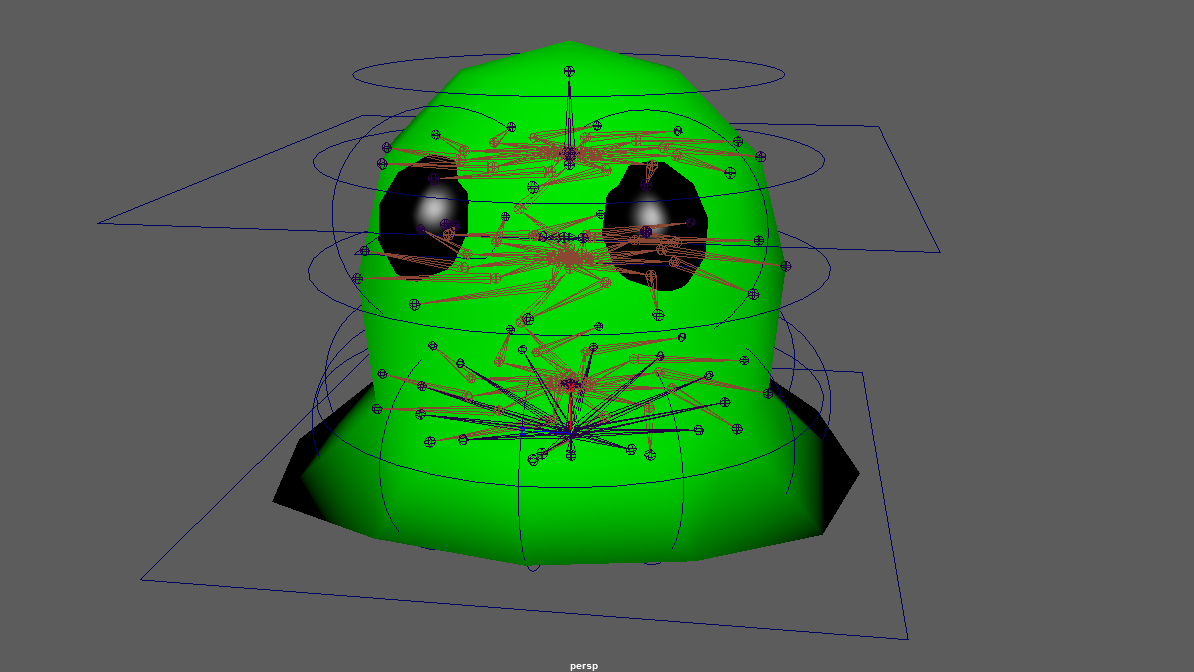
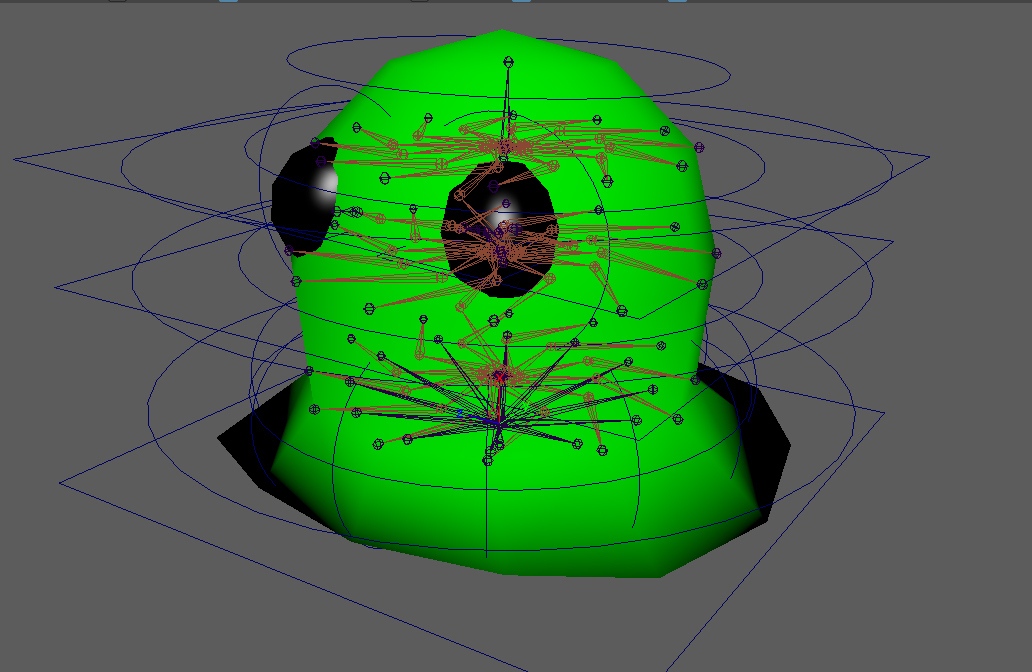
The most challenging part with creating a control rig is how to place the constraints between the Control object and the skeleton. But once I figured it out it is actually quite logical. The NURBS are placed in a hierarchy beside the skeleton so that the objects lower in the hierarchy follow the ones higher up thus maintaining their relative positioning to each other. Then using point constrain and orient constrain to lock the into place to the joint. The only difference is the stretch control. This one has a parent constraint instead because it is the only control that uses scaling as the desired control method while the other ones uses Rotation and Translation. Another thing to make it easier to control is using ikHandles between joints. This creates a “rubber band” between the joint so that the lower joint in the hierarchy controls the ones higher up. Imagine a humanoid arm. Without the ik the arm has o be animated by first moving the shoulder, the the elbow and lastly the arm. With ik enabeled the animator just has to move the hand and the rest of the arm will follow.
The finished result may look intimidating but it is better that the alternative.
|