Playtesting – Blog 5
|
From the beginning of this course, I felt that this part of the development process – playtesting – was a little bit frightening. I thought that the game needed to be almost finished before it was any use in letting someone test it and that it felt scary to show others our product. Reading the literature about game design and playtesting, and by watching lectures in the subject, I have started to understand that it is never too early to playtest your game. I have understood that if you wait until you have nearly a finished game, it is way to late to have a playtesting session, since it will be too late to make any important changes. In that state, you might be able to do some cosmetic changes, but the most important things like the core mechanics of the game will not be something you can change at that time. Also – as time has passed by – for some reason playtesting does not feels as intimidating as it did at the start. A playtesting session is an opportunity when you as a game developer – if you know your MDA (mechanics, dynamics, aesthetics) – can test how the players experience your game, in a much deeper way than if it is “fun” or not. You can test your core mechanics, your aesthetics, the difficulty level of your game and lots and lots of other things. To make the most out of the two playtesting sessions in this course, I decided that we would use both a survey for the players to fill in after playing our game and an observation guide for us in the team, to help us focus on things of value while observing the players. Before the first playtesting session, I talked with the group about playtesting overall and I talked through both the survey and the observation guide, letting them comment and ask questions, so everybody would feel prepared and know what was expected from them. As the lead designer in the group, I designed the survey for the playtest sessions. The questions were designed for playtest 1 (before Alpha), with only a few questions. We did not have a lot to test at that time, so we wanted to know how the players perceived the game mechanics and if there were things they appreciated or not. Since the playtesters were very generous in providing valuable feedback through these questions, I decided to use the same questions for playtesting 2 (before Beta).
There were more things we wanted to know about our game, like if it was too easy or too difficult to play, if there were things the player did not understand and if there were parts that were frustrating for the player. My plan was to receive answers to these questions through observation, a powerful tool in playtesting. I therefore prepared an observation guide for us developers, so we knew what to focus on when observing the players playing our game:
From the playtest sessions we received a lot of feedback, both from the survey and from observations. One thing I take with me into the next project though, is that most of my team members did not write down their notes from their observations on the observation guide itself, but on the back of the sheet. For some reason, they did not think this was easy to use. I need to think of how to improve this part of the playtesting next time I plan for one! The next image shows a screenshot of how I summarized the result from playtest session 2, where I divided the result into categories based on feature.
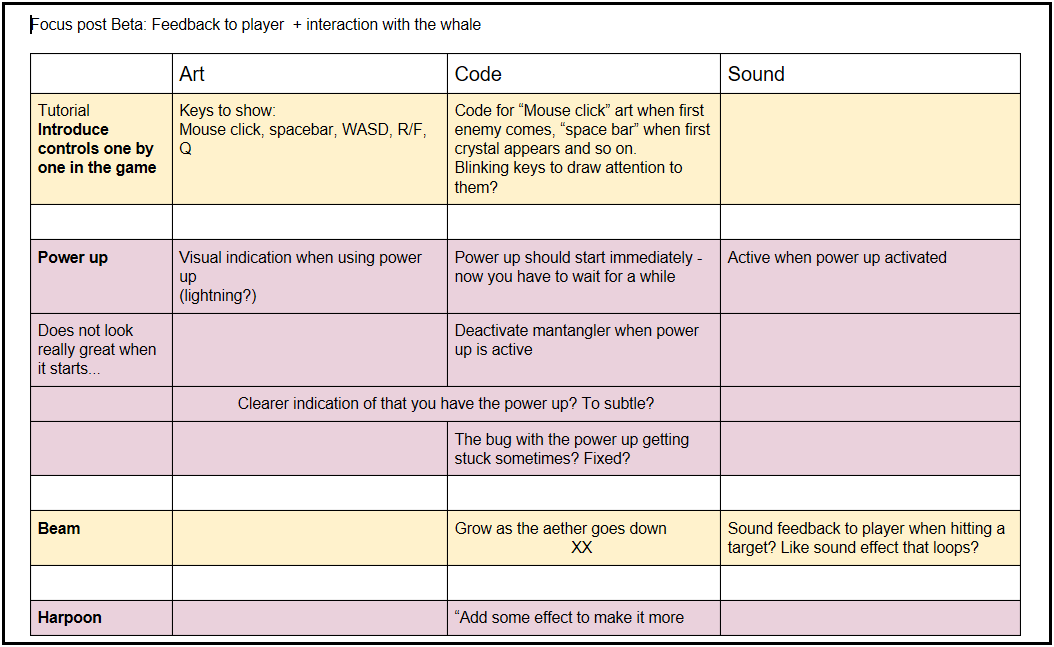
The final picture shows a screenshot of a part of the ”to-do-list” I made after analysing the results (focusing on what would add most value for the player).
To summarize my experiences from the two playtesting sessions we have had during this project, I must say that it turned out surprisingly good. We received a lot more feedback of value than I had expected, feedback that has led to improvements for our game. Thanks to all of you that contributed! |