Level Design – Beta
|
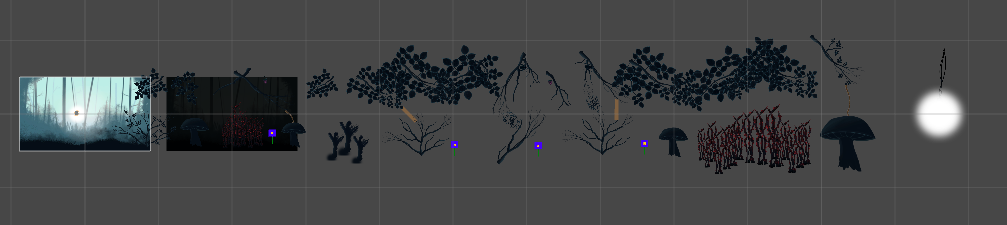
Hello. In this post I will talk about level design, in this case specifically built for the Beta milestone and presentation. A level that was designed in such a way to showcase the game in the short amount of time we were given to present it. If you’d like to learn more about this project you can check my previous blog posts “An Easier Sprint Overview” where I talk about changes to a template that we received from our teacher when first introduced to a project methodology called Scrum, “Designing a Main Menu That Fits Your Game” where I talk about creating a menu that connects with your game in terms of it’s visuals and mechanics, “Presenting Your Game” where I talk about our Alpha presentation for the game and how it was made in such a way that it connects with the game in terms of visuals and mechanics and “Scaling Light – Progress Indicator” where I talk about an object (a light) that draws the attention of the player towards it and in order to show progress it increases in size as you traverse the level. When designing the level for our Beta presentation a few things were important. Keep it short, showcase our work and make it engaging both for the player and the viewers. We decided the level would be done in such a way to be able to fit in the presentation time frame and show what our assets can bring forth. I will start of by showing the entire layout of the level and then explain piece by piece why each section was done as it was:
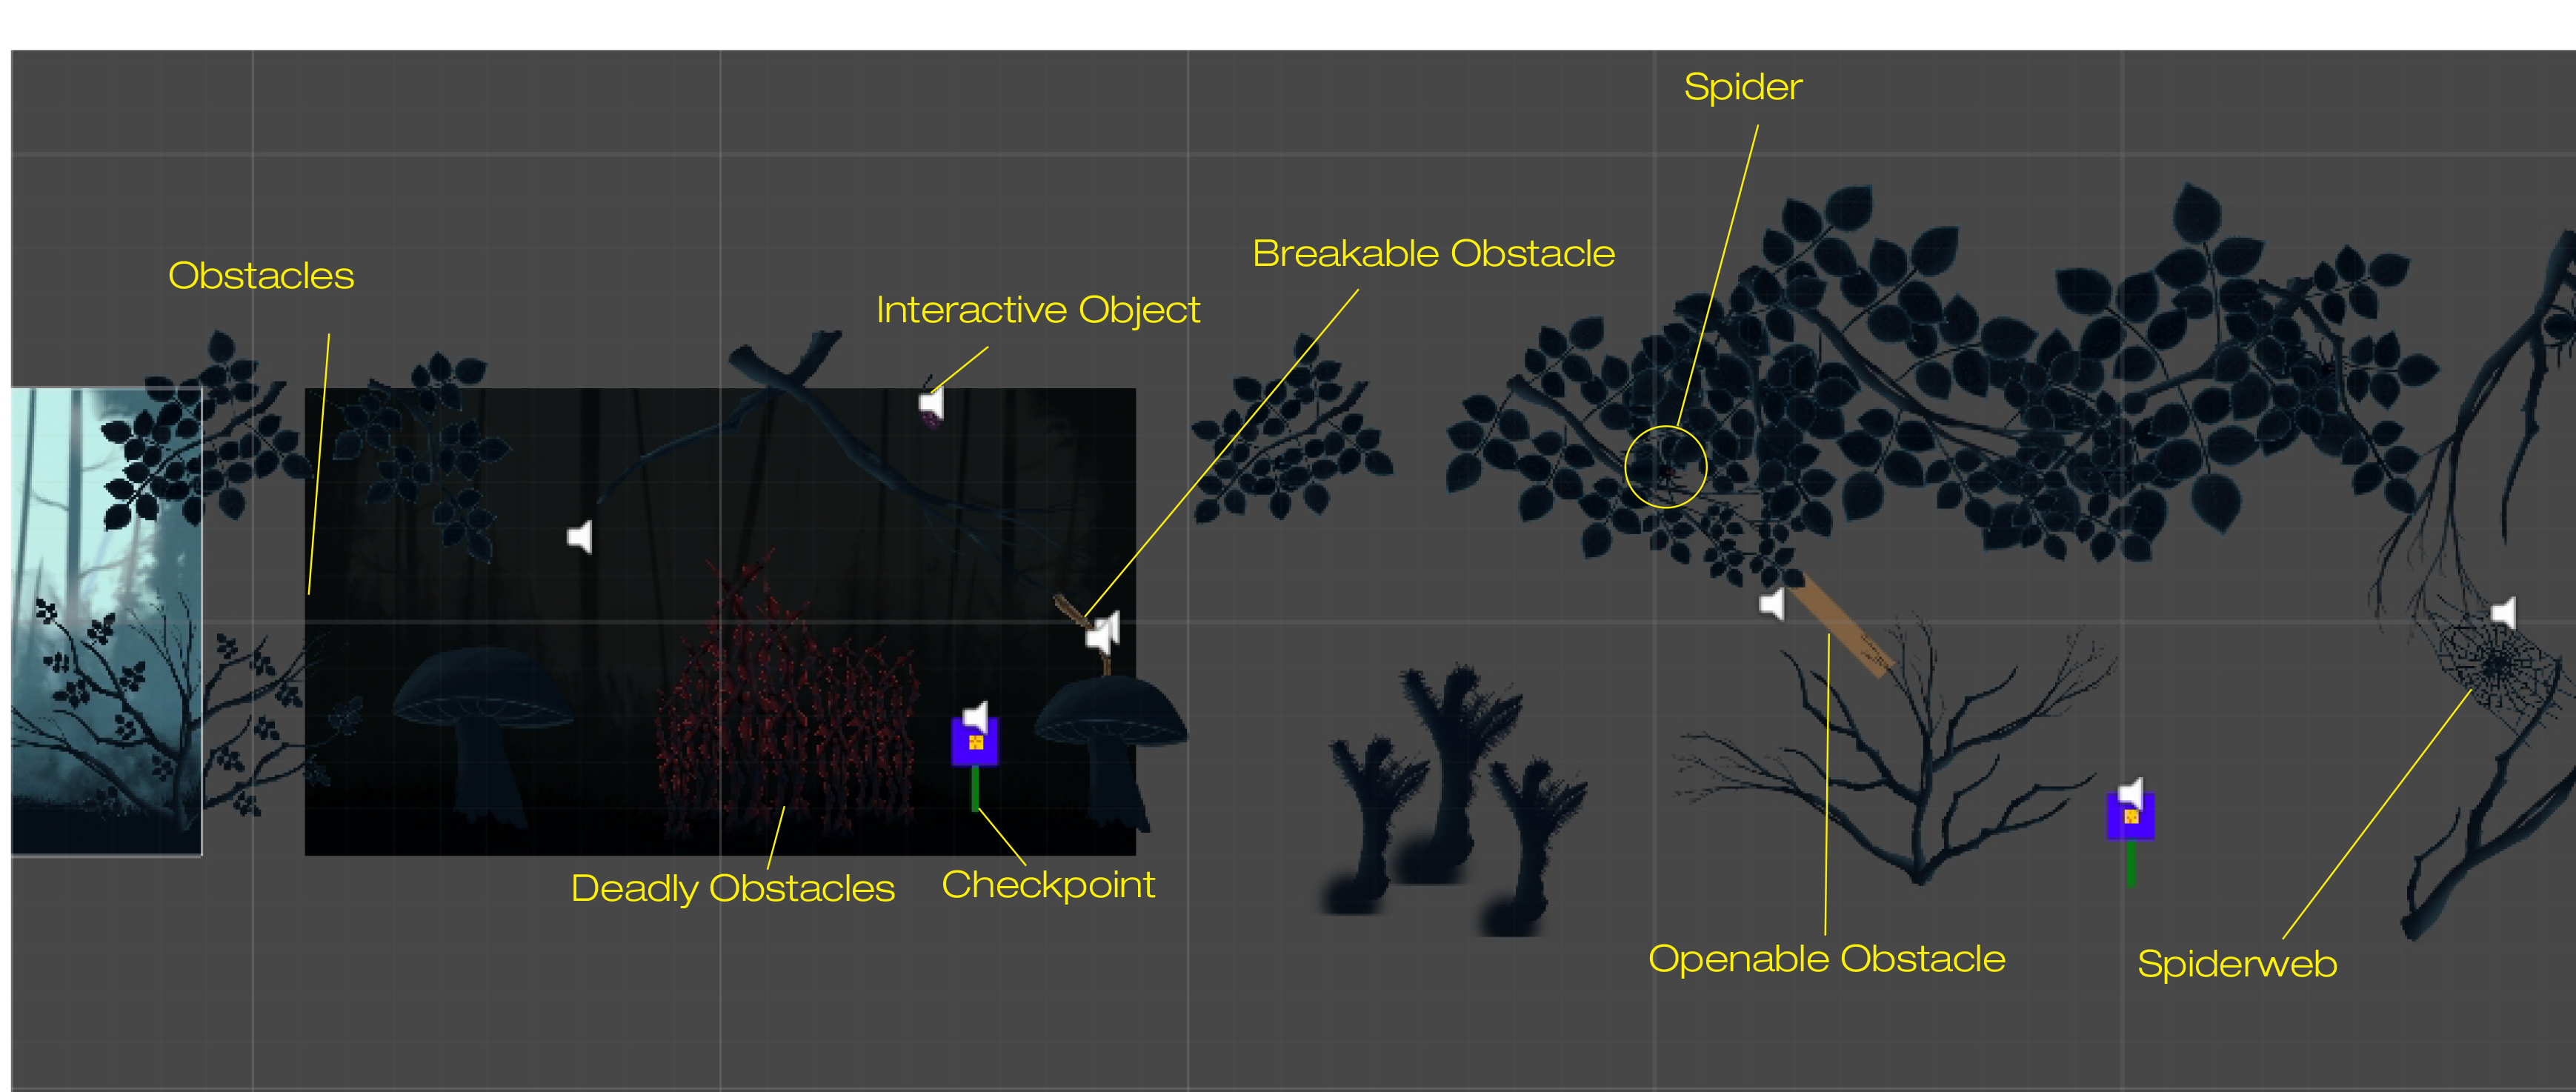
The first section which I will talk about is the introductory one. A section that was both supposed to teach the different interactions between the player and the environment and the mechanics at the players disposal. Below you will see the first section:
You start the player off by introducing him to the first type of obstacles. These obstacles don’t kill you but do direct you through a certain pathway as they don’t allow you to pass through them. They also affect the player’s stamina which is consumed when you use the sonar, the main mechanic of our game. More information about our main mechanic can be found in my previous blog posts introduced at the beginning of this blog. Then you introduce the player to deadly obstacles that would kill the player and in the case of the first part restart the level. After that a checkpoint is introduced that allows a means of saving progress. Then right next to it is the breakable obstacle which requires a power-up picked from the checkpoint when you “land” as the moth on it. Using the power-up (a dash) you are able to break the obstacle and continue. From this point onward the concentrated parts of the level begin. The player is introduced in one small subsection to the concept of obstacles that can not be broken and must be removed in another way, interactive objects that allow for obstacles to be opened but also trigger the spider, an enemy that would kill the player. They show the player that the interactive object does not only open pathways but can also make the level more dangerous. After the player passes these challenges another checkpoint is introduced right before the spider web. An obstacle that pulls the player in and restricts movement unless the dash I mentioned earlier is used to break free. Once the player is pulled in a spider is triggered which gives a sense of urgency to the player to break free as soon as possible. The next section is about ramping up the sense of challenge as you are approaching the end of the level and as such the game. It uses elements taught in the previous section and provides a more intense sense of danger to the player. One aspect that was also considered was to not make it too hard either as it would have to be presented and having the member that would play the game on screen die too many times would result in going overboard with the time allowed. You can see the second section below:
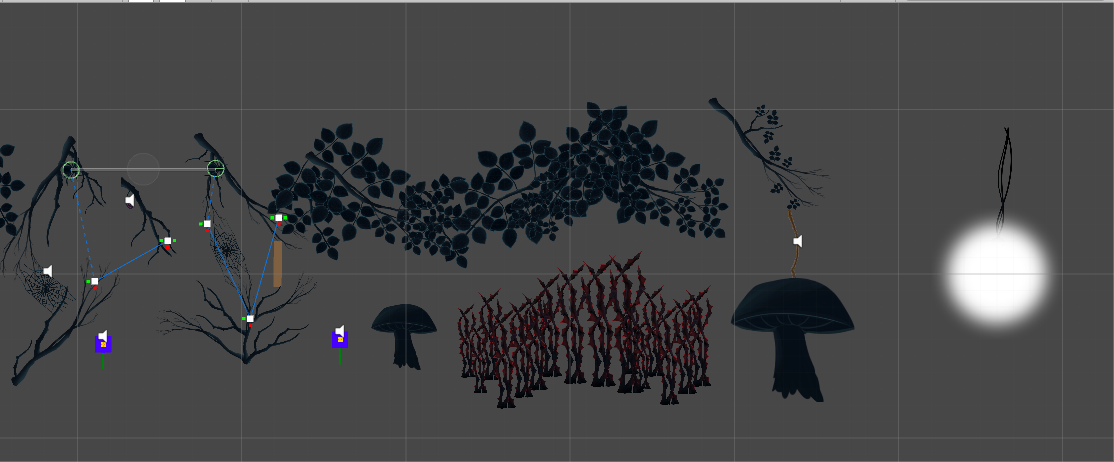
In this section 2 spiders are introduced in the same subsection. Once you pass the first spiderweb you are given a checkpoint. In order to advance to the next subsection you need to pass the openable obstacle as previously introduced in the first section. In the way stands a spiderweb which would trigger a spider and have the player time his movement and use of the dash (the dash also gives you a speed boost forwards and in the case of avoiding spiders can be considered a dodge of sorts). In order to clear the way though, an interactive object is required which is found further back and leads to another spider being triggered. In the image above you can see the pathways the spiders follow represented by the white squares and blue lines. Those are a result of a pathway editor our lead coder Jacob Lindberg made for the purpose of easier level design. The spider would follow those pathways back and forth and would require the player to always pay attention to where the spider is, especially since limited vision is a factor. Once the player has passed the spider challenges a checkpoint can be found and (due to this being a presentation level) a more “quiet” section is introduced. One that provides less of a challenge that leads to the end of the game. A video would have been best here in order to showcase the entire level but due to poor internet I decided to wait on that for now. Designing this level has proven to be quite fun and a great learning experience as well. This level, while by no means complete has provided our team with fun. We had fun playing our game and that by far is the most rewarding experience of all. Since this is the last blog post about our game I will end with, unsurprisingly, the ending:
Thank you for reading and thank you to Team Kraken with whom I’ve learned a lot and had a lot of great moments with! With all our ups and downs I honestly believe we have made a great game! I sign off with this: Echo by Team Kraken. |