Week 6: Animating in photoshop.
|
Hello! This week I finally started working on animating. In Photoshop CC no less, a program that I had no idea you could animate in until just a couple of weeks ago. The only animations I’ve done so far has been an assignment for my graphics course, which consisted of a walk cycle for a stickman, and some pixel animations for a GameJam game in GameMaker nearly five months ago. There was also the time in Macromedia Flash about five or six years ago, so when it comes to animation, my knowledge is very very very basic. I decided that I should stick to animating the same assets that I had been designing up until now. For this week it was the Life Tree. I spoke shortly about the Life Tree in my very first blog post, but to put it shortly, it’s the main object in the game that you as the player need to protect. If it gets destroyed, the game is over. I had decided on designing, drawing and animating this asset since the beginning, and it turned out to take a bit of time. Here’s what the Life Tree looks like as of now. Please note that the final tree will have small iterations and might be a different size.
This is the final design for the Life Tree. It’s called version 3, but is actually the fourth version I’ve made. The previous versions looked too much like tower trees, and didn’t stick out enough. So for this version I went with a more birch-like look, as a nice contrast for the green background of the game. The crown also has a lot more texture and better lighting. The first idea I had when it came to animating the tree was to have the leaves wave in a motion that would make it look like it was standing in a light breeze. When I realised this would be the hardest and most time consuming thing ever, for a result that would be barely noticeable, I instead went with the lights shining out of the crown. I decided to make the lights move in a wave-like motion, but since I wasn’t sure how exactley to make that happen I went with a trial and error procedure, which ended up in only the left most light rays on the top of the crown to look somewhat wave-like. The main issue however wasn’t making the motions, it was that I had made the lights using a vector tool. This meant that the vectors could be moved freely, yet would snap to pre-determined locations depending on where other vectors were positioned on the canvas. The end result made the lights a bit jittery. However, it’s nothing major and goes unnoticed for the most part due to the actualy size of the tree on the playing field. This is what the animation looks like now.
However, even though I stated the jitter was barely noticeable, one of our programmers I showed it too pointed out a slight hacky, jittery movement, which happens at the end of the 2 second animation loop. I’m not sure how to point it out, but I’m sure you’ll be able to see it. This was mainly caused by the issue with the pre-determined positions of the vectors. I decided that the issue wasn’t grand enough to fix right away, and will instead be something to do along with the polishing work later on. On to some more problems with the animation. First off, this was actually a pretty huge file. Over 100 layers actually, at 1.29 GB in size. There are nine light rays in the tree that are all moving in 10 original frames. That’s 90 layers right there. On top of that, a friend of mine showed me the smoothing option that wors sort of like a tween.
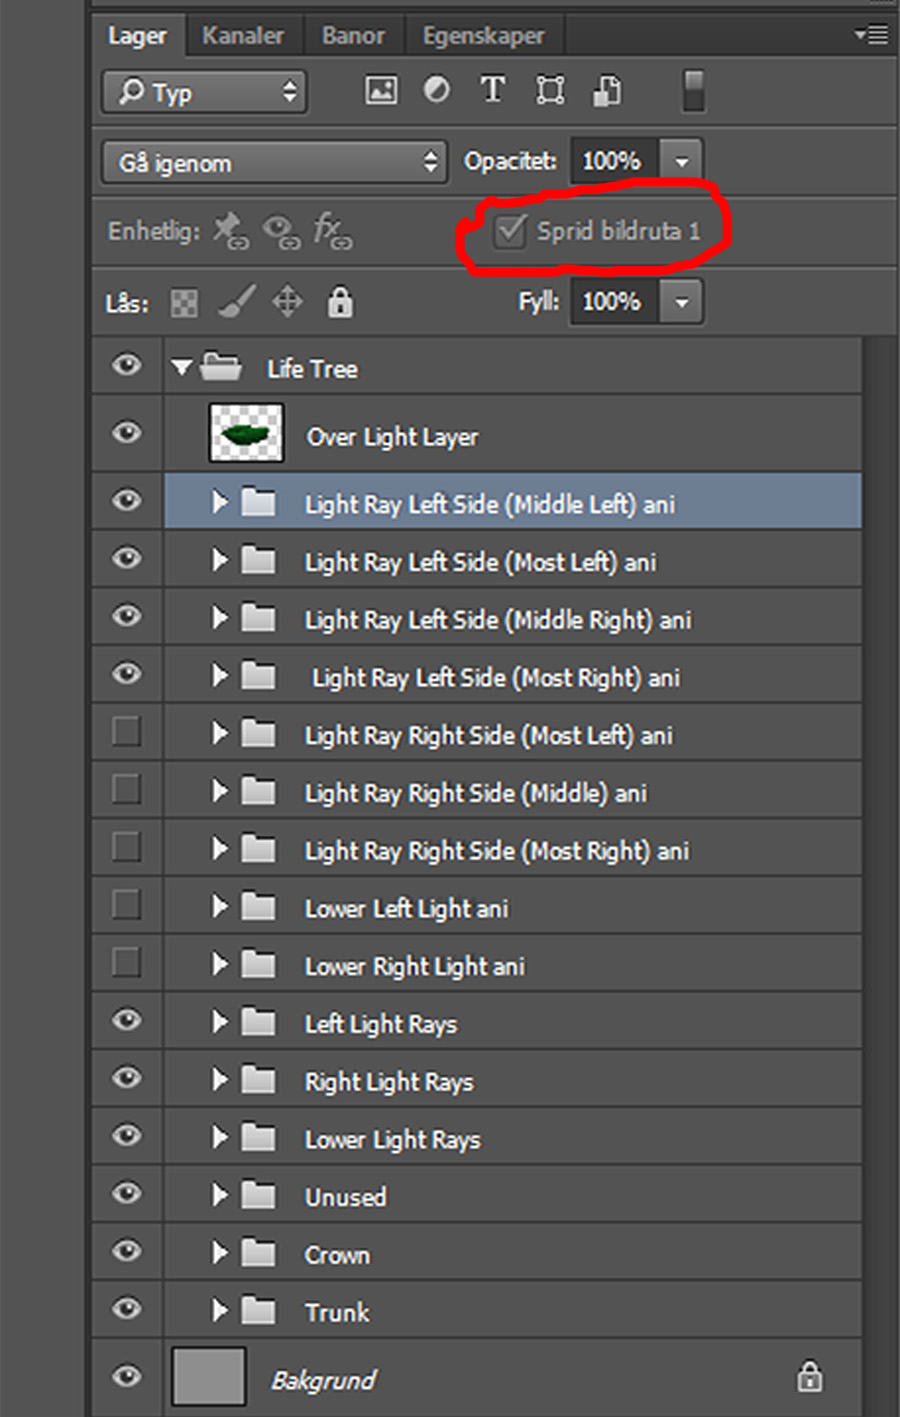
I’m unsure what this image will look like, since it’s a cut-out of a screen shot. The little red non-circular circle is highlighting where the option is for the smoothening / tweening. I made the animation in 10 frames, but with the smoothness I added an extra frame after every original. The odd numbered frames are the originals, and the even ones are the automatic ones. That solved the first issue with the animation not being smooth enough. However, there was another issue while animating.
Here you’ll see all the groups of layers in the file. All the files with ‘ani’ at the end contain 10 layers each, and each group is for 1 beam of light. I animated the light by moving the original sprite up and down, then making a copy of the original layer so that PS would remember the position of the sprite at the exact frame. This took a bit of time, and was made into hell with the option higlighted in the red, poorly-ellipsed ellipse. “Spread Frame 1”. This means that any change you do unto the first frame in the animation will happen accross all frames. This is an option that sticks to each and evety layers, and that has to be un-selected for each layer you don’t want to get messed up. Once I found this little option after about five hours of struggles, animating became a tad bit easier and more enjoyable. I conquered photoshops animation option! I am it’s king! There are still a few things that will be added and changed. One idea is to make the light change color depending on the Life Tree’s health. But this is something for another day, something after we’ve finished the more important stuff. Next up for me is finishing the re-design for the power ups and their animations. Luckily, these animations won’t require hundreds of layers and hidden, super secret options. Thank you for reading! Until next time //Markus Holm |