Becoming the “gitHub master”
|
Right then. Third post, let’s do it. This week I’m doing to be talking about gitHub, and all the headaches and sleepless nights it has caused me. What?GitHub is a form of “version control”. Version control is basically the management of different collections of information. It’s very common and incredibly useful in programming in particular, but it can also be used for documents for example. It’s pretty much essential for projects that have multiple people working on them. The idea is to have a tool for managing every members changes to the project. Let’s say for instance that one person alters a certain script in the project, but at around the same time another member deletes that script entirely. Obviously you can’t both have and not have a script so you’d need to choose whose changes to use. That’s when version control steps in. It will alert you to any inconsistencies between your local project and the one stored in the so called “repository”. Now with gitHub, and quite a few others, you need an additional program to actually merge the conflicted files themselves, but more on that later. The “repository” is simply put the location where the project is stored online, and whenever someone makes a change they upload their version into the repository, so everyone has access to the same version of the project. How?
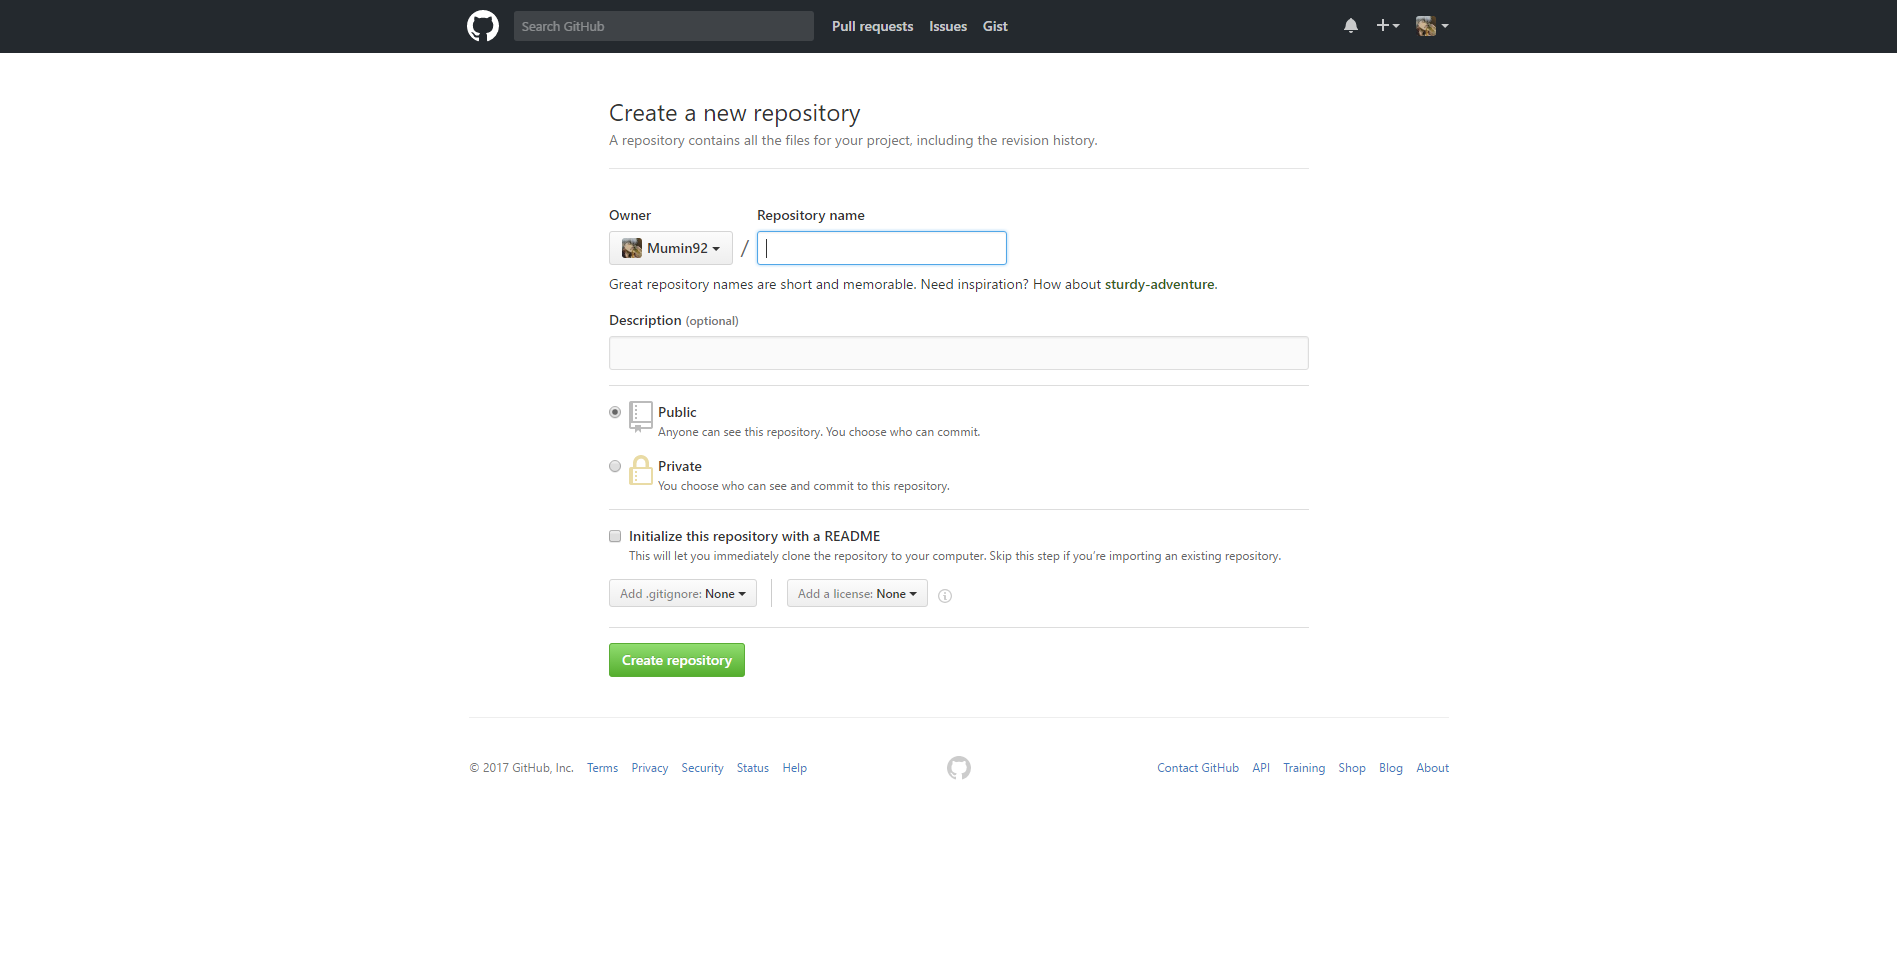
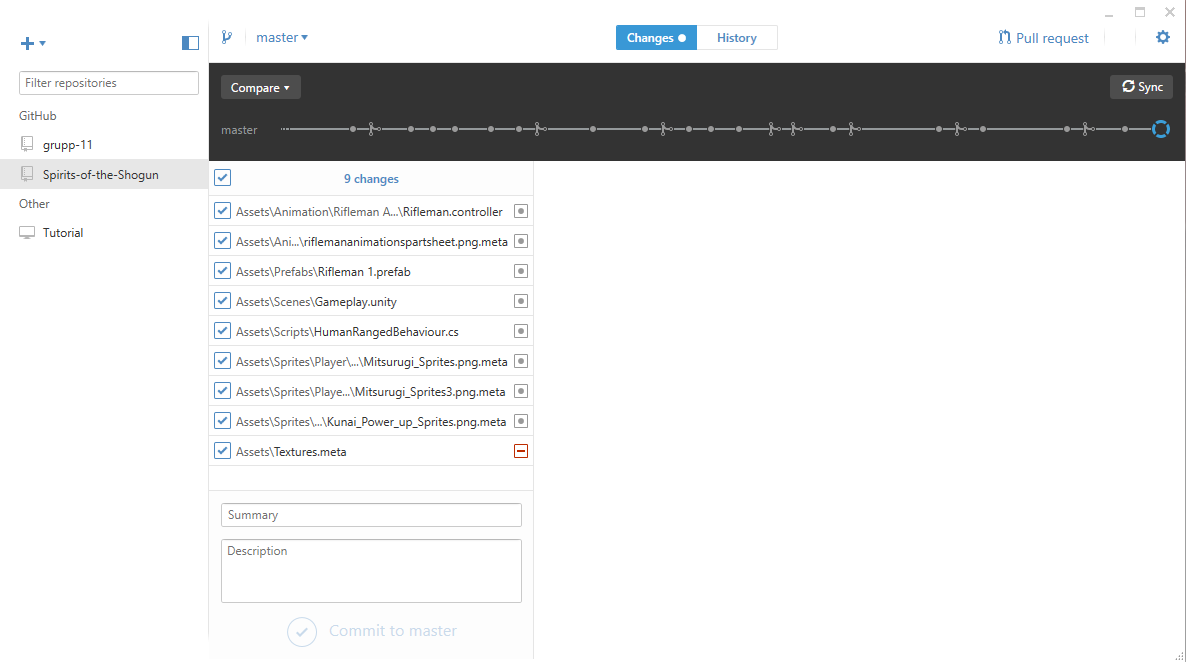
At first you need to set up the repository. As you cen see from the picture above this is incredibly simple. All you need is a name for the repository, a description of said repository and decide wether it’s Public or Private. With gitHub however you need to pay for the option to have it as Private. Then in order for you to upload folders from your PC you need the gitHub desktop app. This is also incredibly simple. You just download it and log in with your gitHub account. The real work however starts after that. As I mentioned earlier you need a third party program in order to actually solve the conflicts that may occur. I should explain; a conflict occurs whenever two people have made changes to the same thing (This is a bit of an oversimplification but that’s the idea). The first problem I ran into was that simply having a program capable of merging conflicted files isn’t enough. You have to edit the gitHub desktop apps configuration file. It’s called .gitconfig and first of all it’s located in a very odd place on your PC. It’s actually in your User folder for some god forsaken reason. At any rate after that you have to figure out what exactly to put in there, and it’s different depending on what program you use (I use one called WinMerge), and the only way I found out what to put in there was to search different forums until I found one where it was explained by some random guy. If I seem a bit frustrated here it’s because there are no official tutorials by gitHub on how to do this, which was incredibly aggravating. Once that’s done though you’re set to start using gitHub! This is what the desktop app looks like. As you can see at the top it has two different tabs. In the “Changes” tab you can see all of the changes you’ve made. Basically every way that your local project differs from the one in the repository is shown here. Whereas in the “History” tab you can see all the changes ever made to your project. Once you’ve written a Summary for your changes (the description isn’t mandatory) you can Commit them. You’re not quite done yet though, you still have to press the Sync button. That will upload all your changes to the repository, and this is also where the conflicts happen, IF they happen at all that is. Why?I pretty much explained this in the “What?” section already so I’ll be brief. Version control software, such as gitHub, is made for situations like ours. Where multiple people are working on the same project at the same time. It makes it easier to manage everyone’s changes, and everyone in the project always has access to the latest version of said project. We chose gitHub specifically because a) it’s the most popular one around and therefore the easiest to get support for and b) because I had used it before. Wasn’t in charge of it last time though, AND there have been a lot of changes to it so honestly it felt like starting from scratch. Still I got through it and managed to teach everyone else as well so in the end I’m quite satisfied with the choice. That’s it for this week. I may have been more vague this time around, and I apologize for that. Had I gone into detail however this would’ve probably become an entire book. At any rate I’ll see you all next week! |