Week 3
|
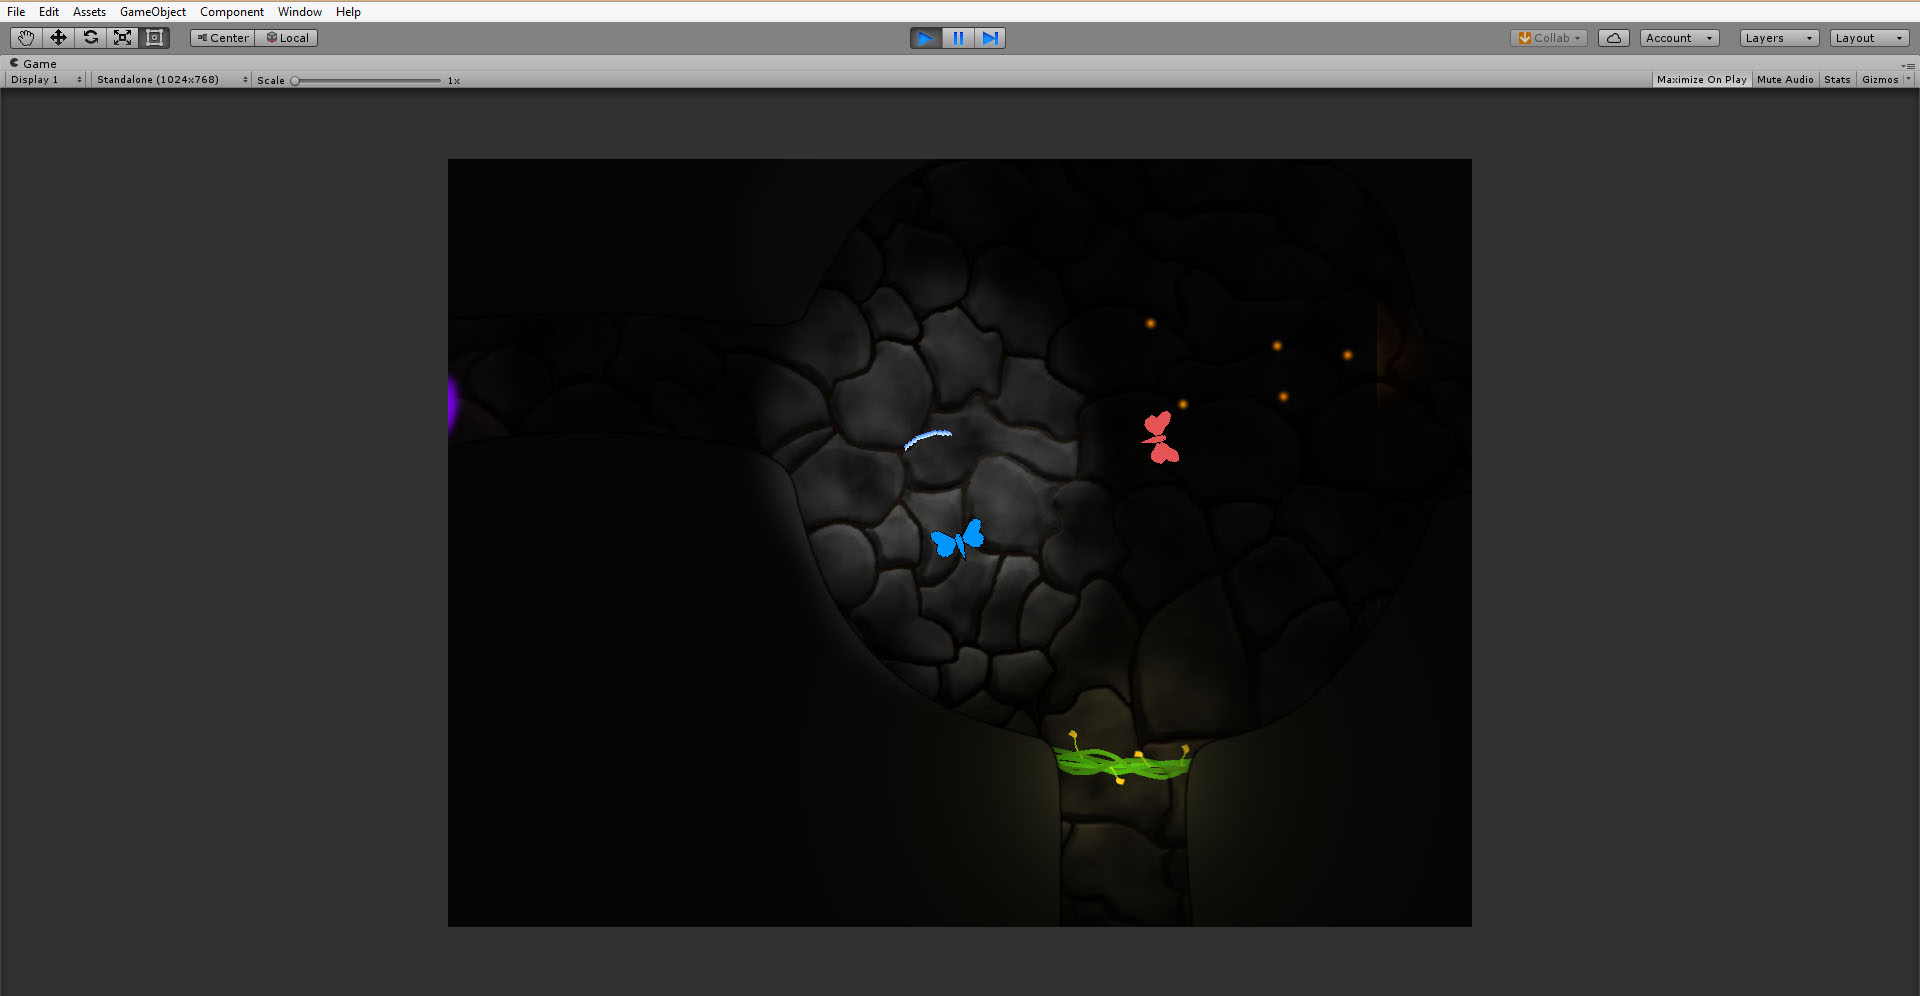
The artifact I have chosen to write about this week is my creation of a tileable background for our alpha prototype. My role in our group is producer/project manager, but since one of our graphic artists decided to quit the program last week we have had to reevaluate our roles and take on tasks that were not originally planned for us. I have no official knowledge in the graphic area but with some improvisation and a lot of youtube-tutorials I think I might be able to produce decent material. Our game is set in a semi dark and cave like environment, where a moth is trying to activate lighting sources in order to be able to search for its lost babies. For our alpha prototype, we have settled for a simple look with a background consisting of some kind of a stone wall. My task was to create that stone wall. I started out with searching for a helpful tutorial, and I found one of almost the exact type of tile that I aimed for. It was very pedagogic and by watching and pausing I could follow it easily.
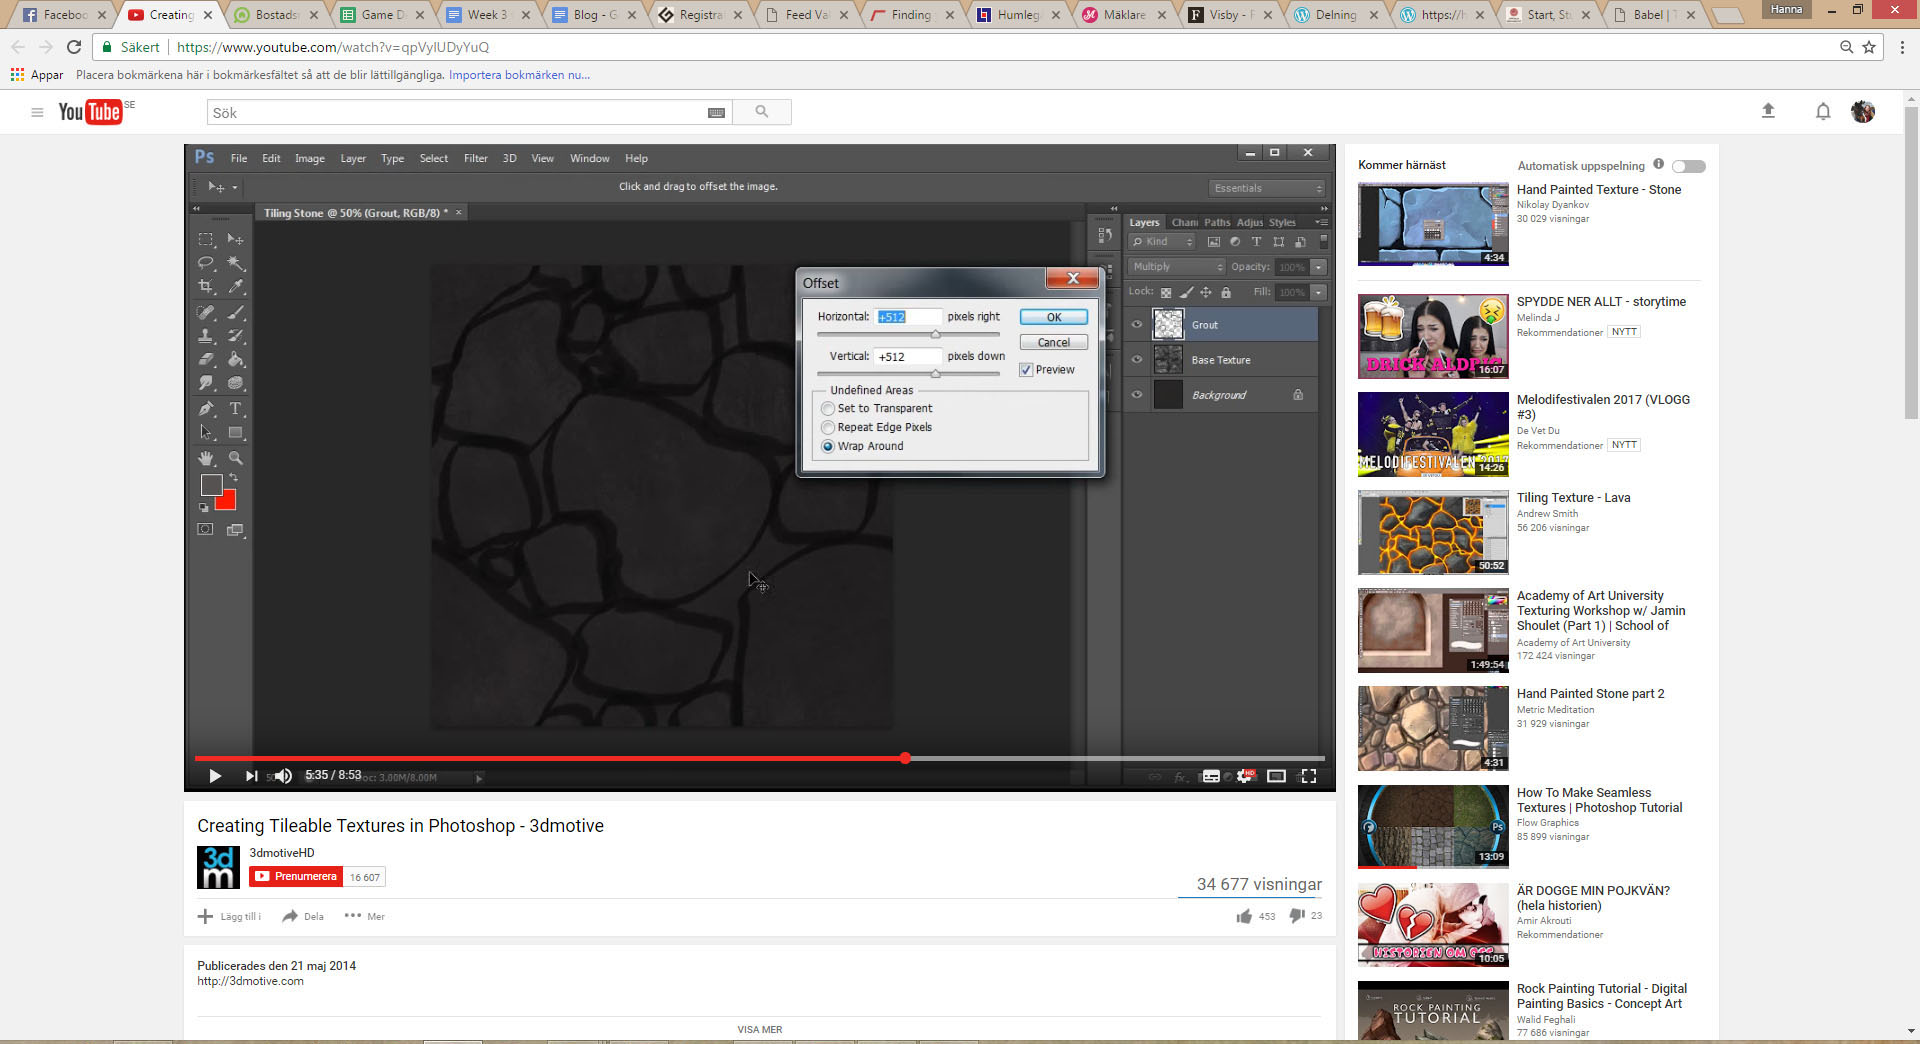
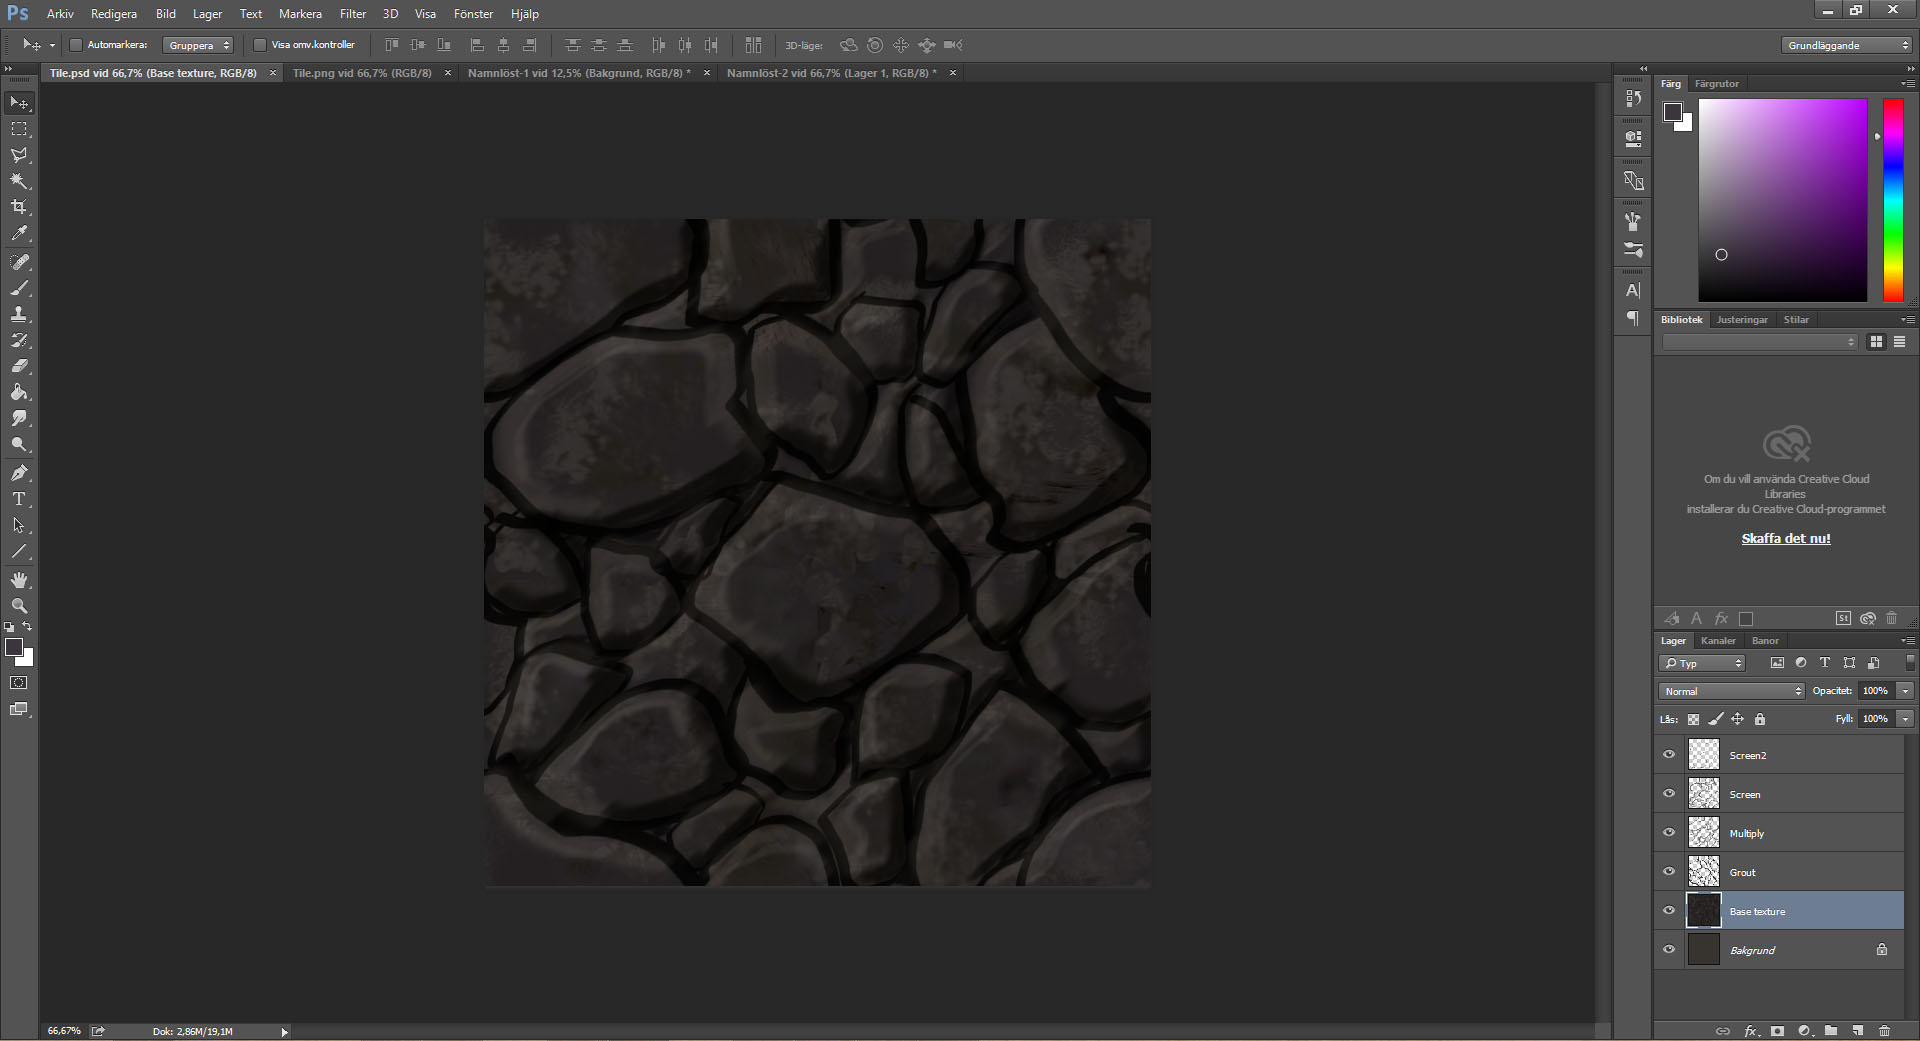
The first step was to create a base texture. I chose a quite warm, dark greyish color to begin with and added texture by using a range of different brushes randomly. When I felt satisfied I changed the levels a bit to get the right contrast and light and added some blue in the color balance. To make the tile tileable I used the offset function and the clone stamp-tool to smooth the edges. When the texture was alright I created a new layer and sat it to multiply to add the shapes of the stones. By drawing the shapes in the middle of the image and then offset with half the total pixel size multiple times I could create a pattern that covered the whole image. I added shades and highlights to the stones to make them look more stone like. At last I used the offset function again but set on about a third of the total pixel size and made small corrections to places that looked a bit off. After this step the tile was completed and we could add it to our prototype.
|