3D Computer Graphics I: Assignment 1
|
This post will be dedicated to our first assignment that I finished and handed in last Sunday. We have been working on it since week two and gone through step by step the whole process from rough model, cleaning up and optimizing, UV-mapping and making three different types of textures. I will go through each of them.
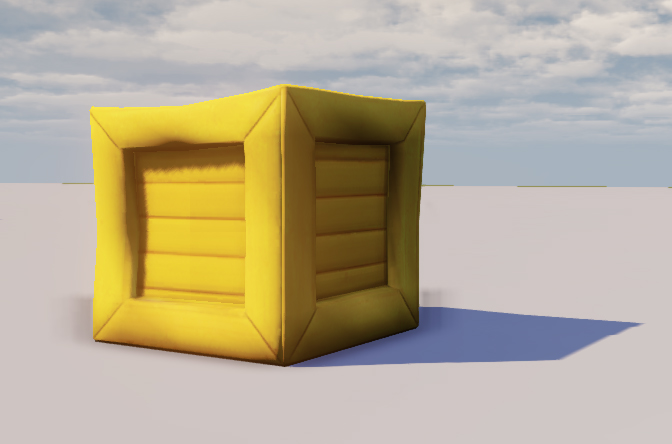
Finished Crate Diffuse Map The diffuse map is basically an unlit color texture, which is meant to give the model its color and a contribution to its texture. What is said to be the most comfortable way to creating diffuse maps is by using manipulated photo textures. What to think about: An optimal photo for the use of texture work is taken from a straight on angle with no skewed angles. It should also be taken with no direct lighting, optimally on a cloudy day. The reason to not have any shading or extravagant highlights on a diffuse map is because this will happen through other maps instead in order to be able to look at the object from many different angles without it breaking the illusion.
Specular Map The specular map is what is used to define how shiny an object (or details in an object) is. It is a lot more important that one might think at first. In fact, some might argue that the specular map can be more important than the diffuse map in some cases. This is due to how we humans perceive objects at a distance. Before anything else, we tend to spot whether something is shiny or matte. Color gets distorted through the atmosphere but shininess remains. What to think about: You use a greyscale image to define what is shiny and what is matte and also how shiny or matte these are. White equals 100% shiny while pitch black equals 100% matte. One spots very quickly if a specular map does not feel correctly adjusted so one might like to be thorough and do a lot of testing before saving the final map.
Normal Map The normal map gives an illusion of depth to what actually are flat polygons. This keeps the poly count down massively. What to think about: You start with making a greyscale image where the white is full protrusion and black is full intention, while the grey in the middle is neutral. After you have a greyscale of the topology you process it in software that can convert this to a RGB normal map. I used a trial version of Crazy Bump for this (and it could create a separate specular map of the same greyscale image). One might wonder what to model and what to create with the normal map and one can go about it like this: Does it break the silhouette? Model it. Does it not? Make it a normal map.
Summary of Assignment 1 Just a few weeks ago before this assignment, I didn’t know anything about modeling and texturizing. To learn the literacy of 3D graphics from zero prior experience has been and still is a time consuming and tough journey for me. But I have learned so much, and even though this crate is very simple, I will let myself be proud of what I’ve made to then focus fully on our next assignment. |