Visual Aid
|
For the player to easier see what they are doing we used a couple of visual aids. Early on we used a particle emitter emitting invisible particles that would spawn visible particles when colliding with the ground to show where you are focusing your listening.
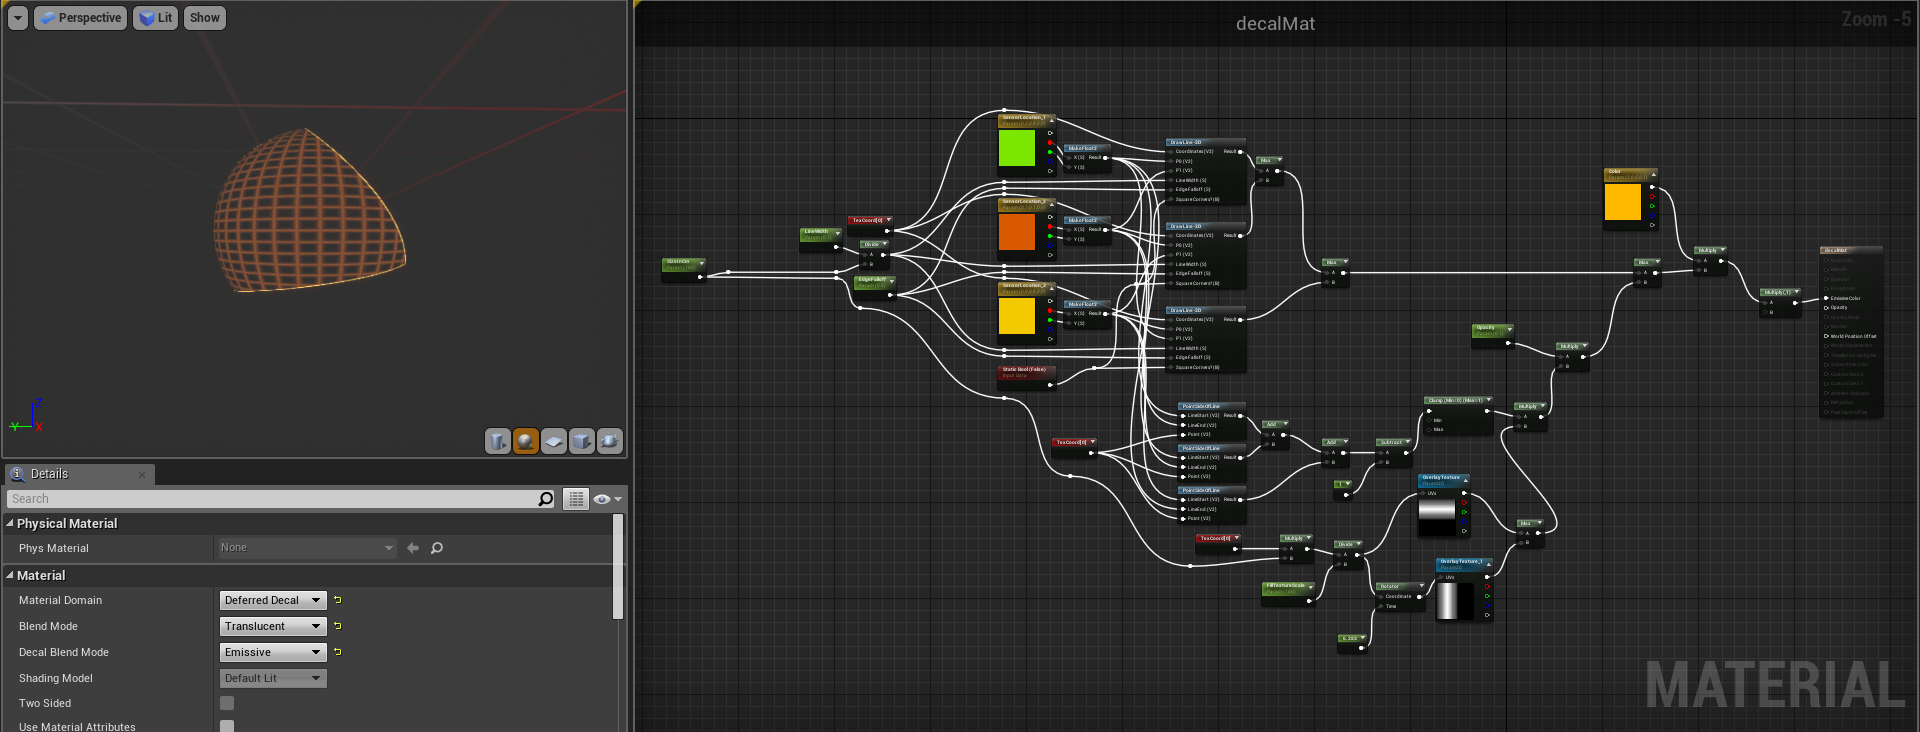
This was hard to spot, not very cost effective and hard to control. I had looked in to how to project materials onto surfaces but had somehow missed deferred decals which does exactly that. Setting this up, however, was very challenging. First, the material.
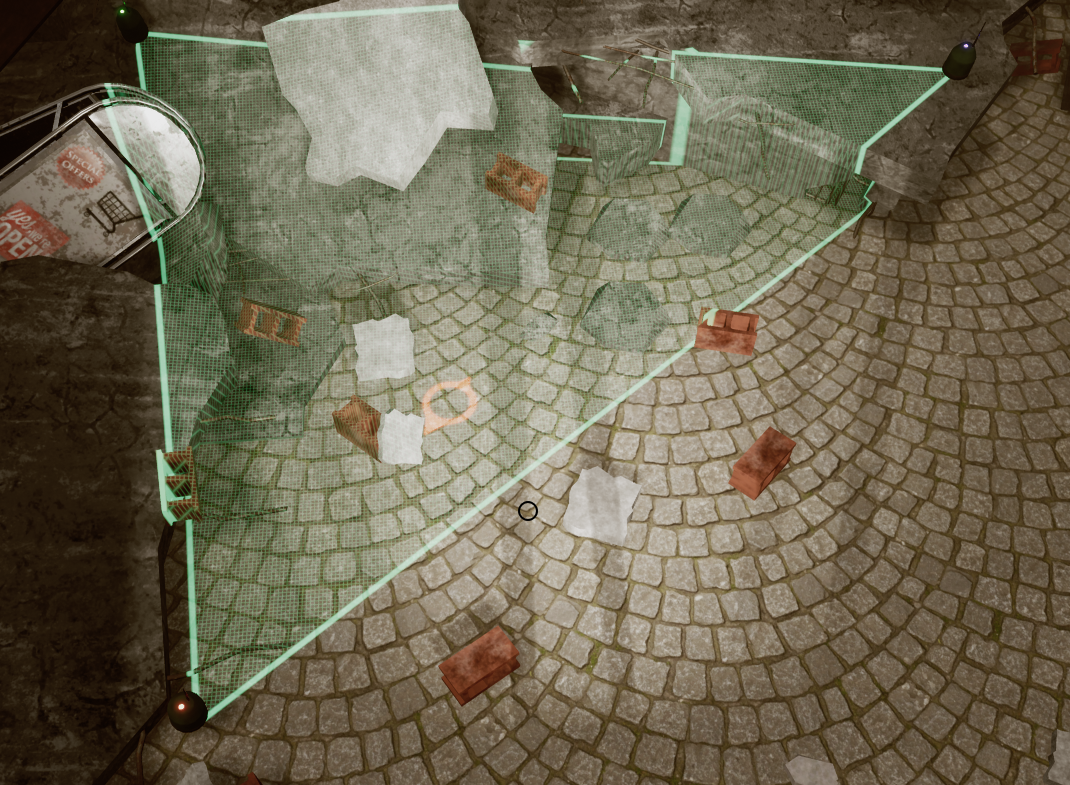
What this material does is draw three lines and then fill the inside of those three lines with a grid pattern. However, in a material you work within the space 0,0 to 1,1. Since the projection was going to be different sizes depending on how far apart the sensor were placed I had to account for that in the thickness of the lines and the UV scaling of the grid pattern. To calculate what’s inside the triangles I used the cross product of the lines and the points to see which side of the lines they were in. This meant that the three points would have to be ordered so that the the lines where going clockwise. In blueprints I had to first determine the clockwise order of the sensors and then translate the world coordinates to the material coordinates. Then I had to calculate the size of the triangle and input that. The focus point of the sensors is the average position of all sensor weighted to what their dials are set to. We wanted the direction each dial dragged the focus point to be a bit clearer so I made another decal that was rotated towards and colored the same color as the sensor that was currently being adjusted.
I am quite pleased with how it turned out. Out of everything done in this project, this is one of the few I think I might save for another project. |