Day of the Piñata Week 7
|
Day of the Piñata Week 7
Greetings once again! Week 7 of our 10 week project is soon to an end and I have started to see the light in the end of the tunnel. We can see the end of this project. This week I am going to explain my unnecessarily problematic procedure in creating sprite sheets.
I’ll use the medium piñata’s walkcycle.
 The issue is that every frame is 1952×1306 pixels which are far too huge. The reason why they were animated in such a big size was that when animating with non-vector images in flash, you lose quality when you rotate them. I have an example below.
 
In the second picture notice how jagged in the edges the image gets. It is because when importing images to flash they get converted to bitmaps. Flash is primarily made to animate in vector graphics which can resize and rotate in any manner without losing pixels, which bitmaps can’t. Why I did not use vector graphics in flash was because we could not achieve our game’s somewhat painted look with flash’s tools.
Anyhow, to solve the information loss issue I simply covered it up. I animated huge images. Exported each frame as a PNG without resizing them. Imported them into the same file in Photoshop and there resized them to the accurate size. Viewing every frame at once I cut off left over space as well. (I did this when viewing all the animations for the medium Piñata in the same file to avoid frames being centered incorrectly in comparison to other animations.) By doing that the information loss in the images gets so small they can’t be noticed. Then that problem is solved!
Next issue was that they needed color correction. In the beginning we hadn’t completely decided on the hue of the colors in the game, and I needed to start animating right away. So I did that, deciding I could correct them later, and so I did.
After I exported all the resized frames out of photoshop I used “Glue it” to create them into a sprite sheet. Then I opened it in photoshop and simply put a cut out from our game’s background underneath and from there I adjusted the hue of the piñata until it fitted together with the background and other assets. What I did was to add a blue photo filter, and after that I opened color balance and added more yellow to the high lights. I repeated the exact same procedure for all the sprite sheets to make their colors identical.
Here you can see before (left) and after (right).
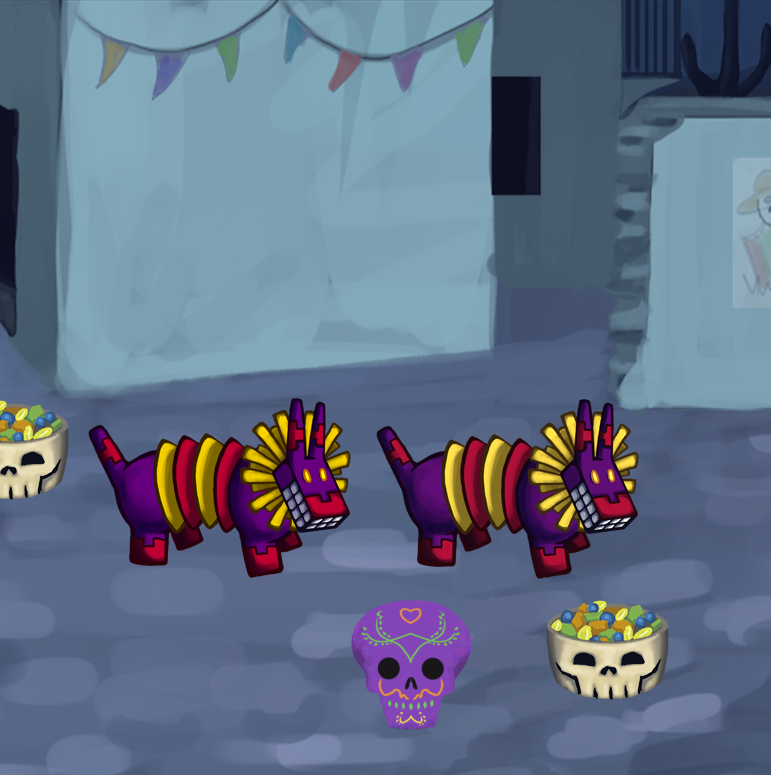 Left is far more saturated in the colors compared to the background, and they are too little blue. Right is more calm in the colors, sticking out less making it more part of the world it is placed in. It seem more to be in the same light as the background.
And there we have it. A slightly complicated ride, though necessary. I would have liked to show an animation of the finished sprite but I don’t possess that at this moment. How to make a sprite sheet into a gif that is. See you next week!
|