Level Design – Tutorial Through Gameplay
|
The game my group and I decided to develop was a game concept called Umibozu. This game has the aesthetic goal of approaching something mysterious and is set in an unknown place in the waters of Japan. The player is portrayed as a ship that sails around a thick mist with limited light to see its surrounding. One of the vital tasks for the Alpha presentation is to make a basic level design for the game. My immediately though for this assignment was to design a level that introduced the player to the core game mechanics from the start, basically a small tutorial through gameplay. After watching several videos regarding level design, I came across a video with Shigeru Miyamoto commentating on the first level of Super Mario Bros and what their though process was when they were designing that famous level. I will leave the link to that video later on down below. Watching this video made me realize how well thought out and important it is to develop a good level design and how the small details are vital for the player, even if the player is unconscious of these details. I started by breaking down the ideal basic mechanics to teach the player from the start, this is what I ended up with: Player:
Items:
Environment:
Enemies:
With Miyamoto’s video on level design in mind, this is what I managed to design:
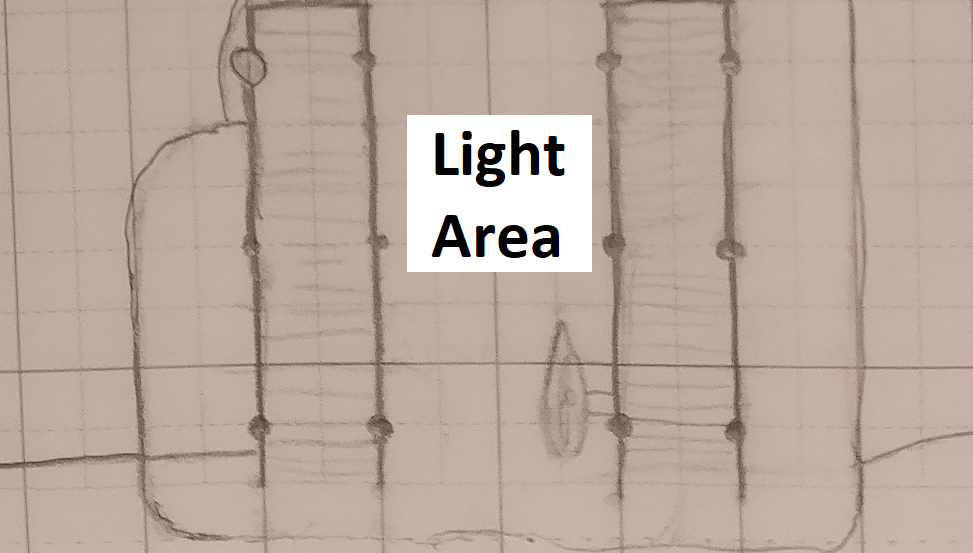
My initial thought was to introduce the player to the light mechanic by having the player start in a lighted area, as shown in figure 1-2. In the player’s perspective as seen in figure 2, what you see is the two docks beside the player with light poles represented with filled dots, the mist that makes the water barely visible on far end of the left and right side, and of course the player represented as a boat. Here, my intention was to let the player know how the light interacted with the mist and how the light made things visible. A small detail to notice is the light pole on the top of left-side dock that is represented by an unfilled dot, that is supposed to represent a broken pole so that the player gets a further hint about the light mechanic interacting with the mist.
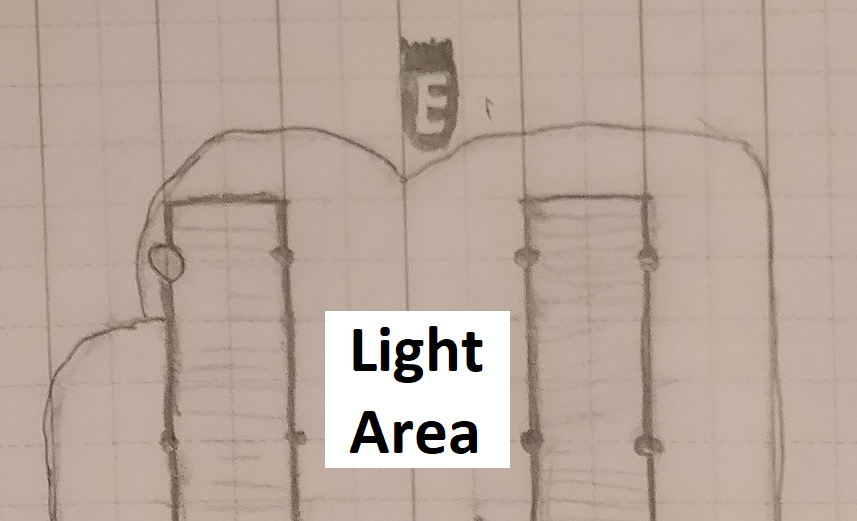
After teaching the player of the light and mist mechanics, I designed the level so that as soon as the player moved forward and the mist could be visible at top covering approximately 20% of the screen, a seen in figure 3. A silhouetted enemy would then begin to move towards the player. This would teach the player how objects in the mist are represented as silhouetted shapes and how in the light these silhouettes objects would show their true identity. Other mechanics the player is introduced to here is how the shooting mechanic and that specific enemy’s mechanics work. As the enemy moves towards the player it will reveal its moving pattern and its attack mechanic, if it manages to hit the player. Also, as the player is forced by the two docks to move forward, the only reasonable thing to do in this situation is to shoot at the enemy. For this particular scenario, the enemy would be the squid, because the squid is the weakest and slowest one of the three enemy types in the game. Just after that scenario, I had in mind to place a health item in case the player got hurt by the enemy.
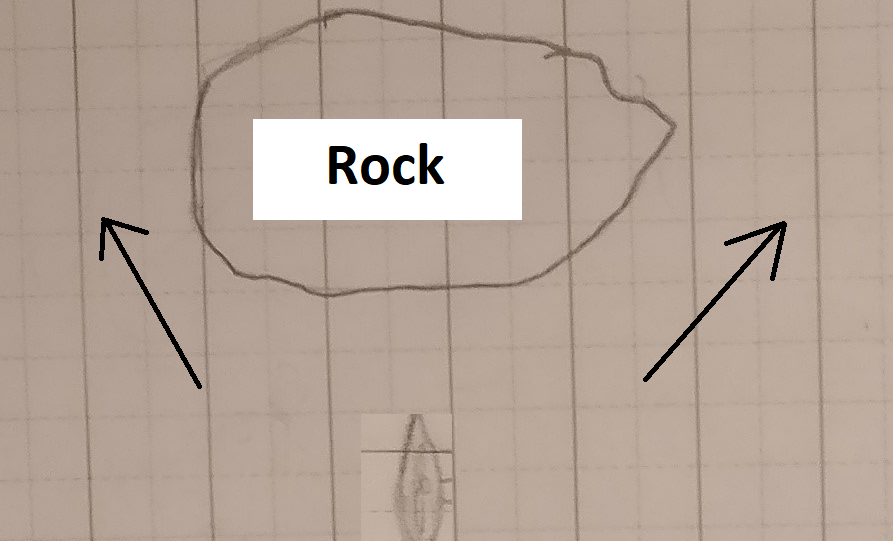
Now that the player has learned how the basic mechanic of game works, the only thing that is left is to make way for the main gameplay. So for this, I placed two big rocks in the middle of the map close to the docks, see figure 4. The reason for the placement of the rocks is simply to force the player to go either way, right or left. The left and right area is going to be where the main gameplay/events takes place.
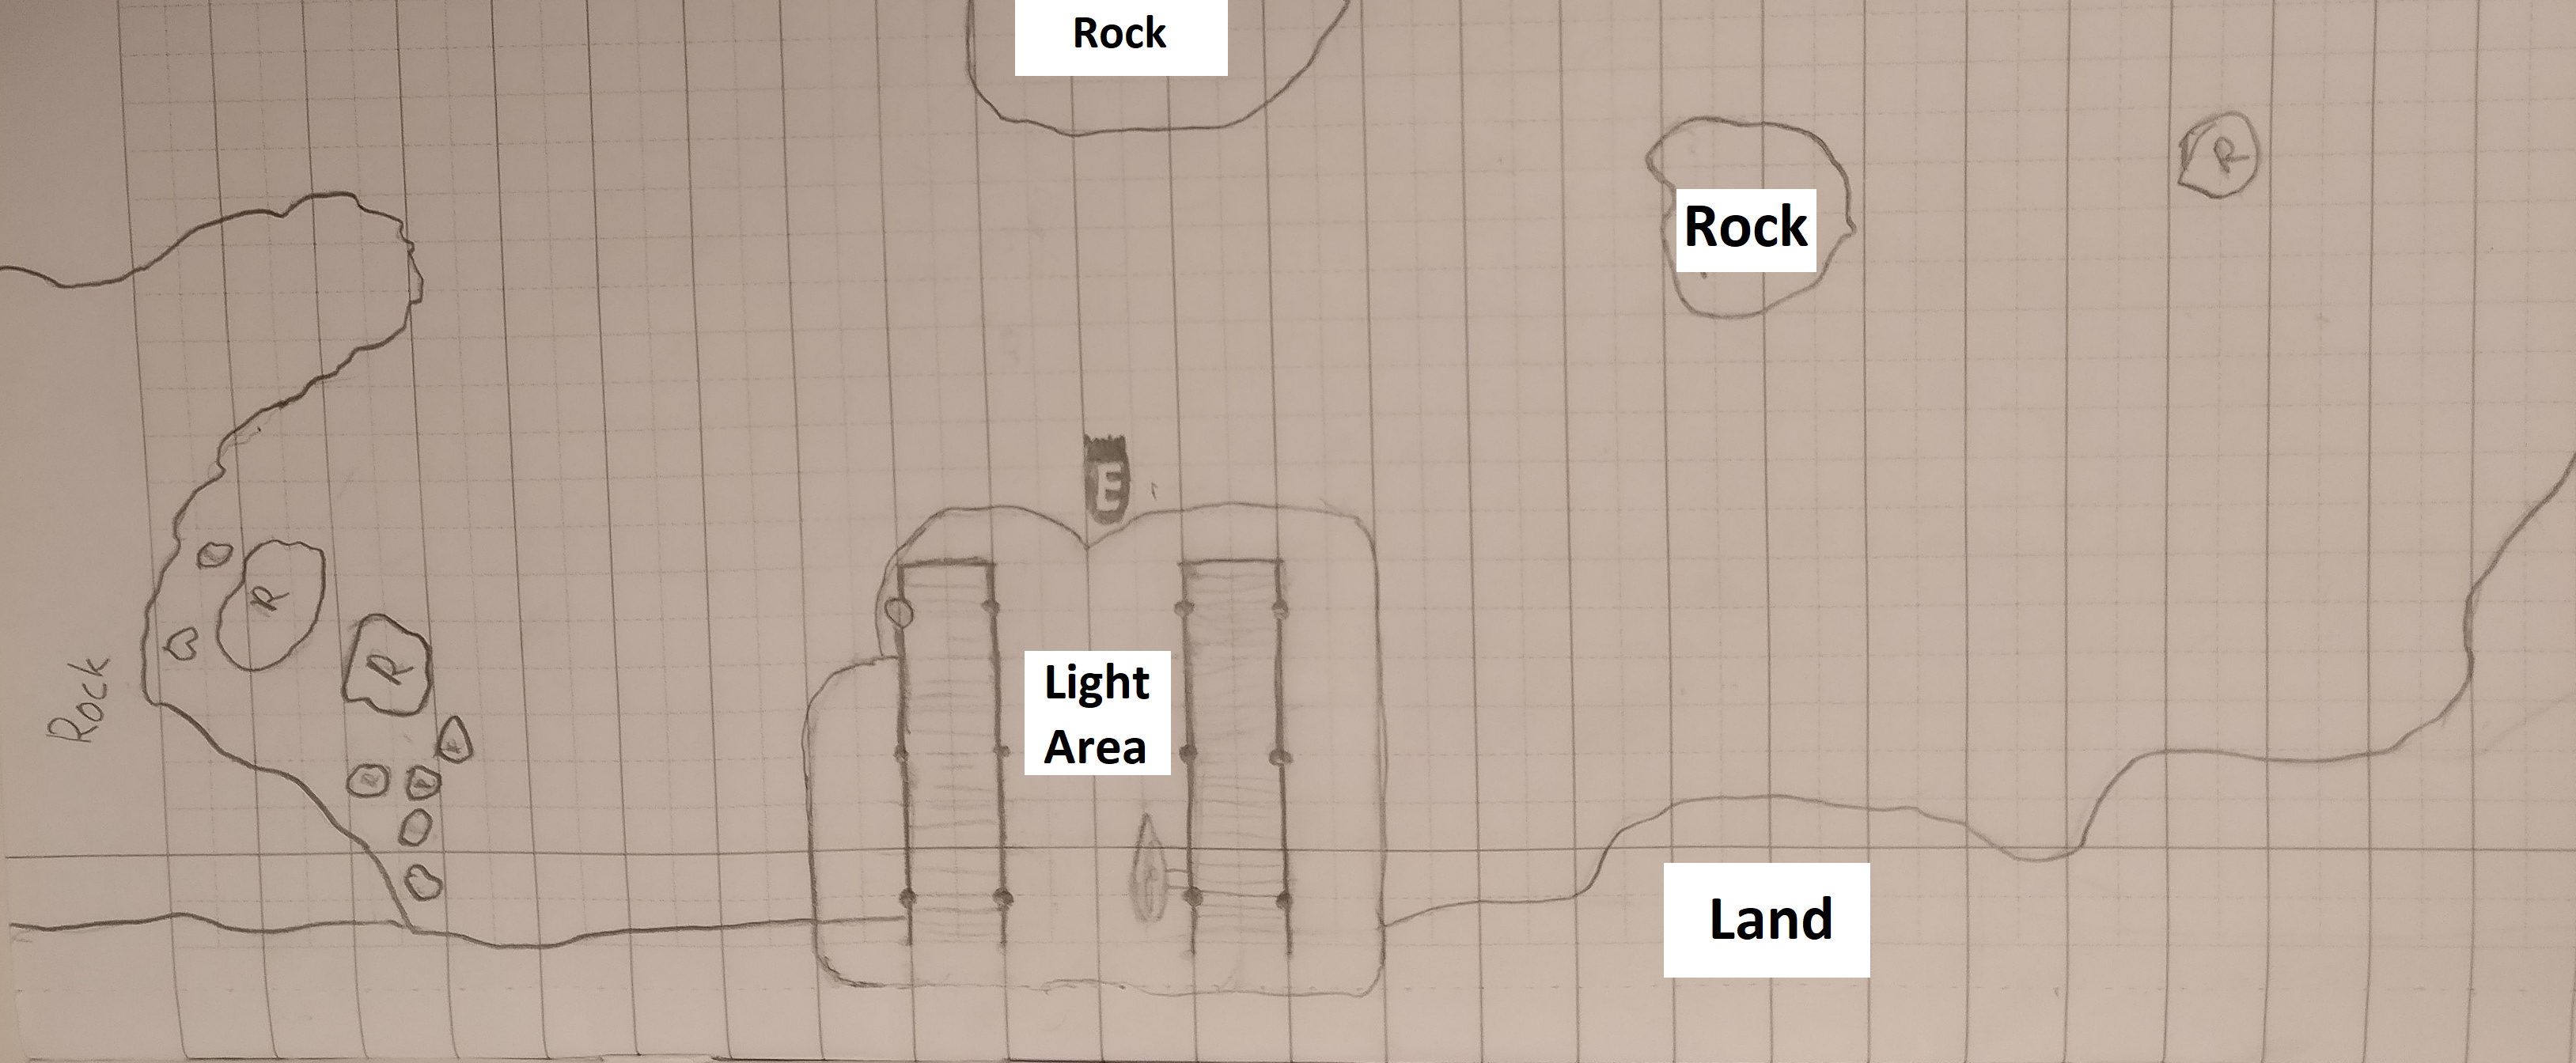
If the player would not choose to sail up north, they would eventually find themselves doing so as the there is only a small area for the player to move around, because of the rocky shore.
For the right and left area that the player is forced to sail towards, I was thinking to design those as events for the main gameplay in the coming sprints, because this has to be implemented in the game engine first to test it out and then it also needs to be tested during the Alpha presentation. Here’s the link to the video on how Super Mario Bros first level was design with Miyamoto: https://www.youtube.com/watch?v=zRGRJRUWafY |
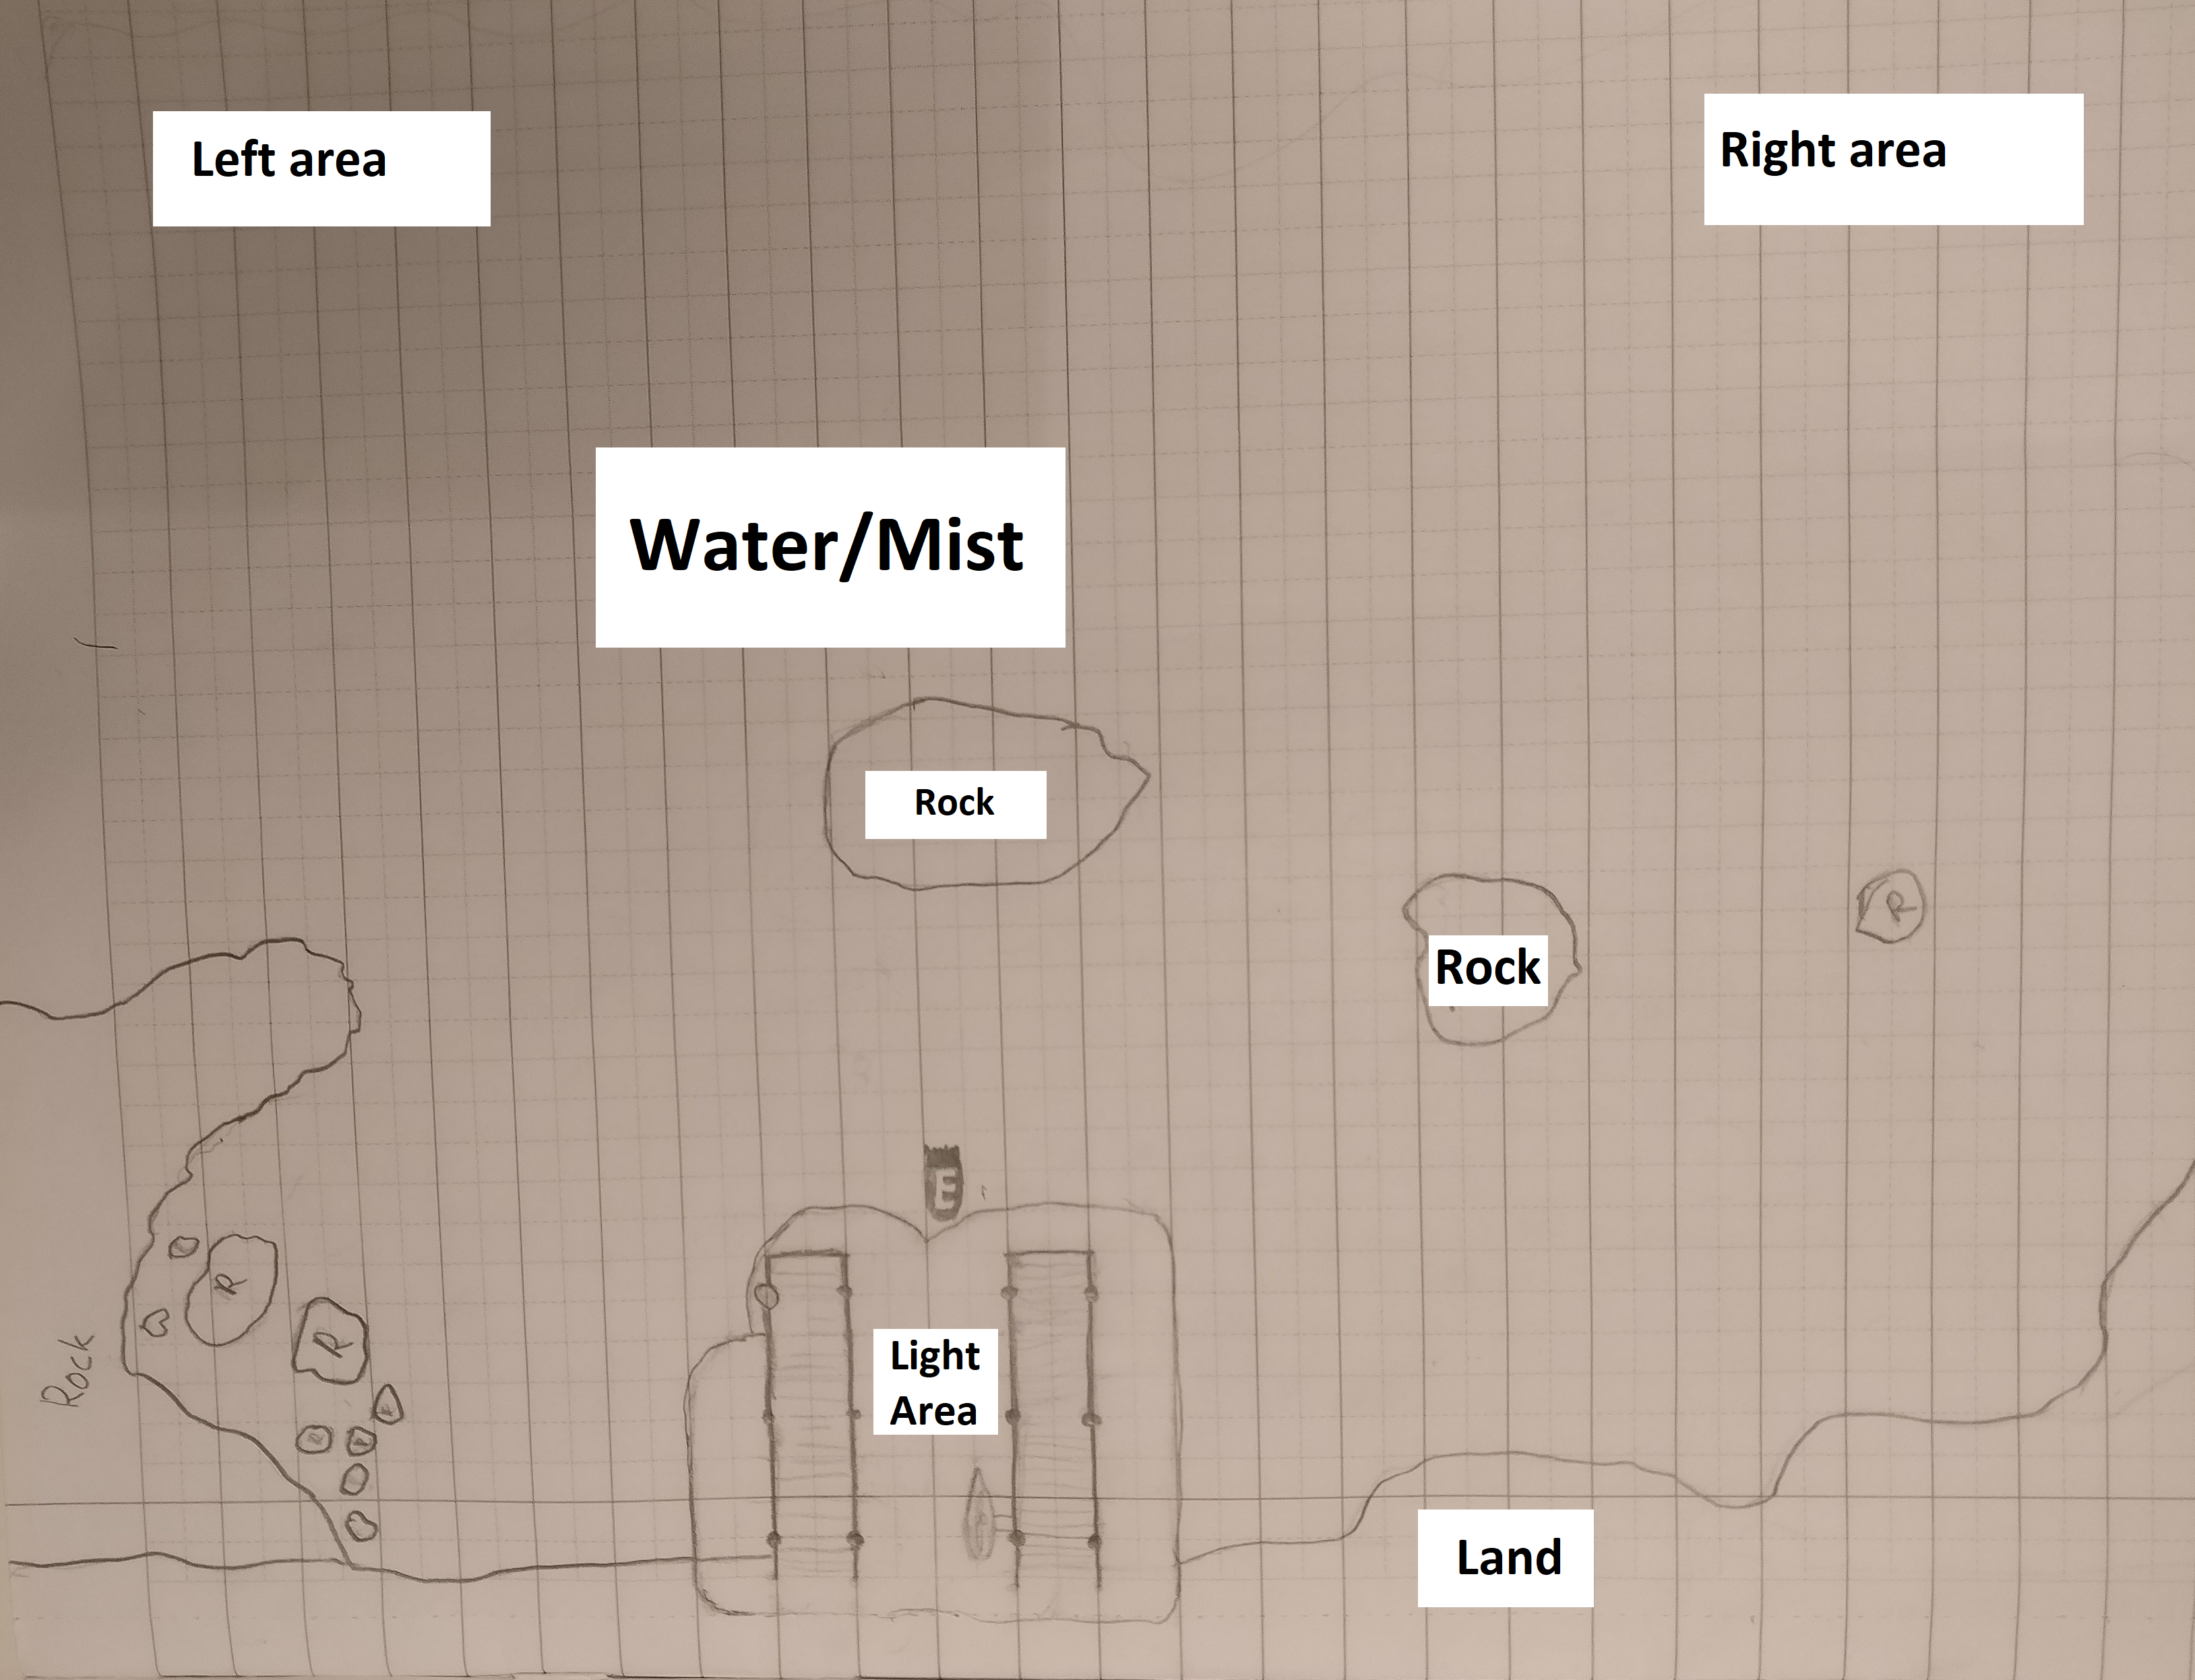 Figure 1, level design for the game Umibozu in paper form.