Sound of Life Blog #5
|
Hello again! Today I want to talk about Color Grading and how we utilized color correction in order add a tone/mood to our scene. What you do is that you are taking the final rendered image and manipulate the color spectrum that the scene is rendered through, in a way that fits the mood of the scene. In order to do this process, you need something called a color look-up table(LUT). You can find this LUT in Unreal documentation site under Post Process Effect – Color Grading. Think of LUTs as the spectrum of color that the rendered scene is running through, now if we can manipulate this, we can change the final output. 
Color LUT Now all you have to do is to take a screenshot of your scene, paste it in Photoshop and make a new layer for the LUT. In Photoshop, I going to use manipulation layers like levels, curves and hue saturation in order to change the scene to the final output. Since they work globally within the document, they will also affect the LUT layer.
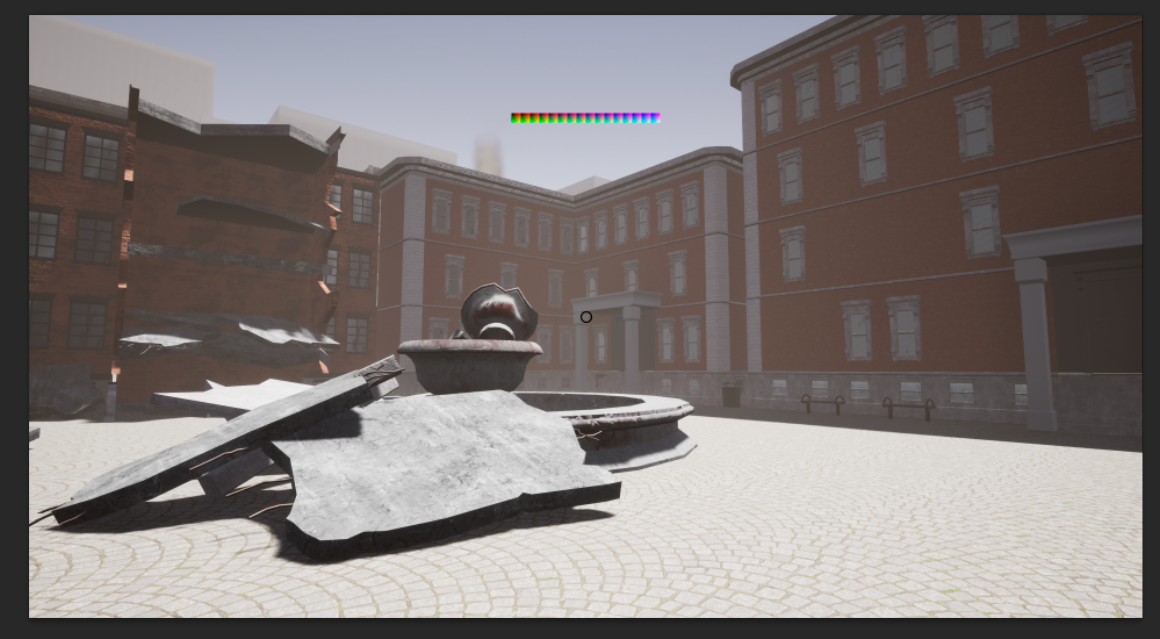
As you guys can see by the screenshot, the image has a blue/gray tone to it. This has mainly to do with the distance fog, skybox, and the concrete texture. The color grading that we are going for, is a desaturated orange tone throughout the scene. The first thing I did, was to add a levels manipulator, inside this manipulator, I increased the amount of red in the red channel, magenta in the green channel and yellow through the blue channel. This gave me a very strong orange tone to my image.
Here’s where the hue saturation layer comes in, as I simply lowered the amount of saturation, in order to get a subtle orange tone.
And last but not least, we have the curves layer, which I used in order to add a bit of contrast by adding a little bit of blue.
Here’s the result in Photoshop, and what you do is select the LUT layer, collapse all manipulator layers, isolate it, then crop it and save it as PNG.
Before 
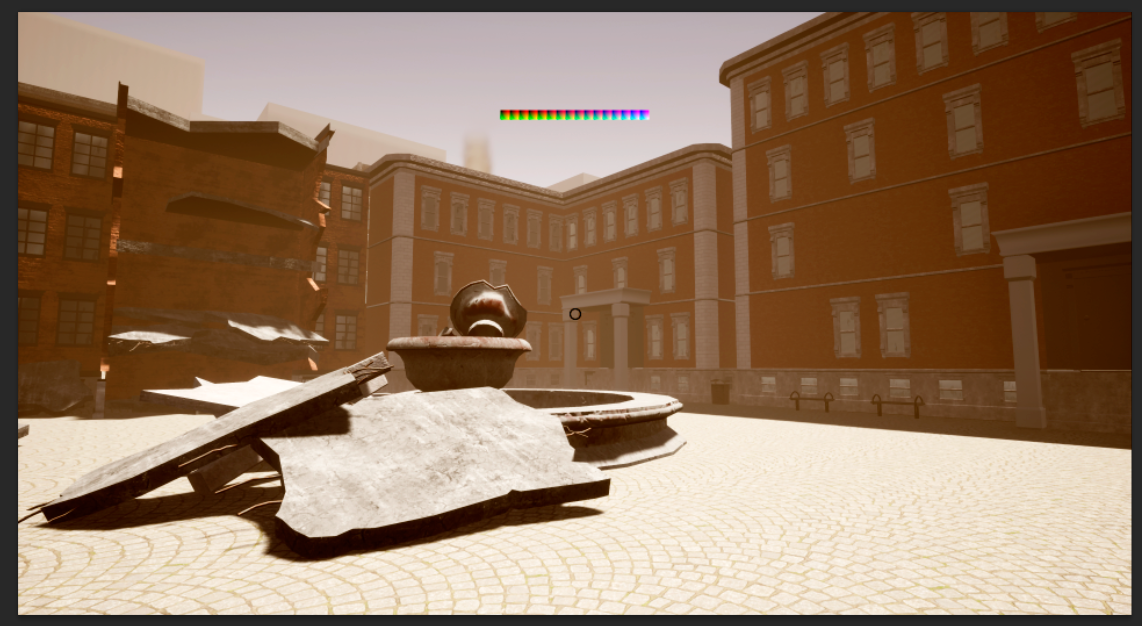
After And now you have new color LUT that contains the changes we did in Photoshop. Now all you have to do is import the LUT image to the engine and change the image texture group to ColorLookupTable. Create a Post Process Volume (under volumes tab) that covers the scene. Inside the Post Process Volume, you go to Color Grading – Global -LUT and drag in your image. And there you go, the entire scene is now color graded according to the changes we did in Photoshop.
|