How I greenscreen
|
Hello again! Last week I managed to finish the puppets and that means that this week will be the week of After Effects!!
To make a proper green screen I needed a few things.
The greens screen process is easy in the sense that I only need to film my sense. But here I tried to make slow movements to decrease motionblur and of course I needed to have as much of myself out of the frame, reducing things to mask by hand.
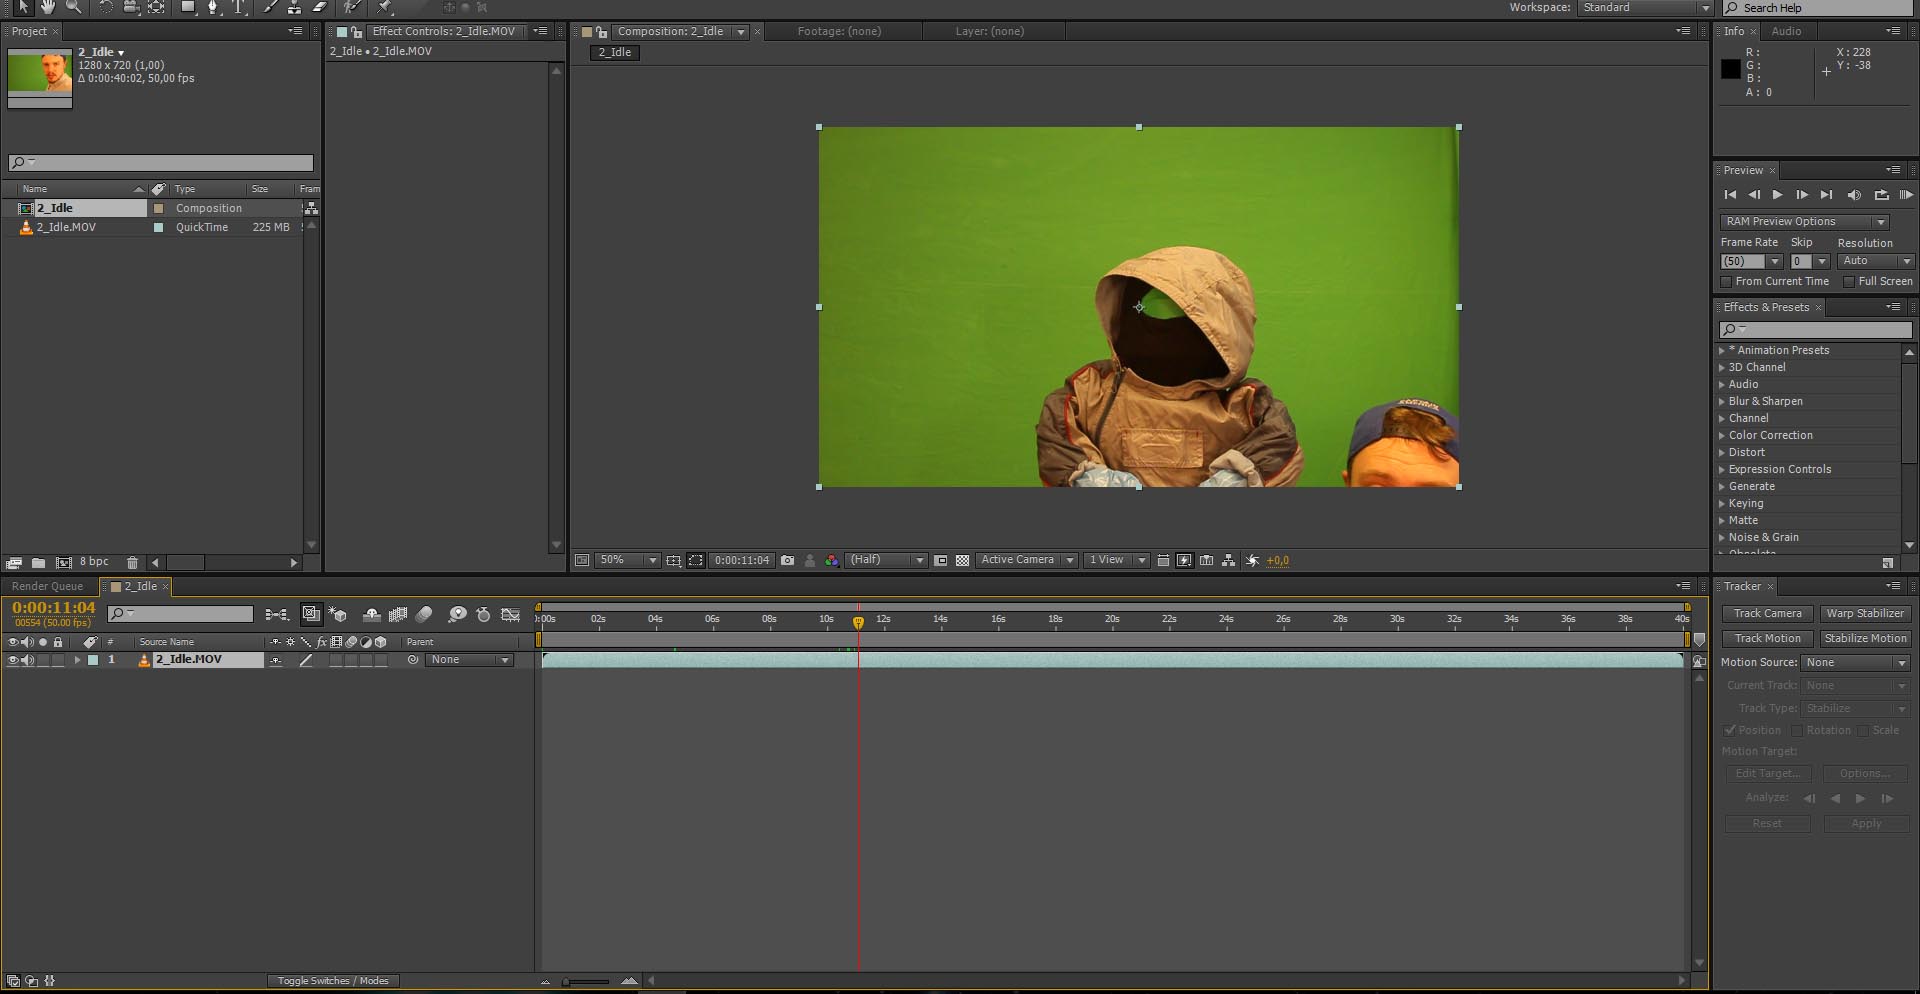
I start of by adding my footage to AfterEffects and cut out the part that I need for the animation. The green right here is very green but we have a few shadows in the corner. That is fixed with a Level effect. 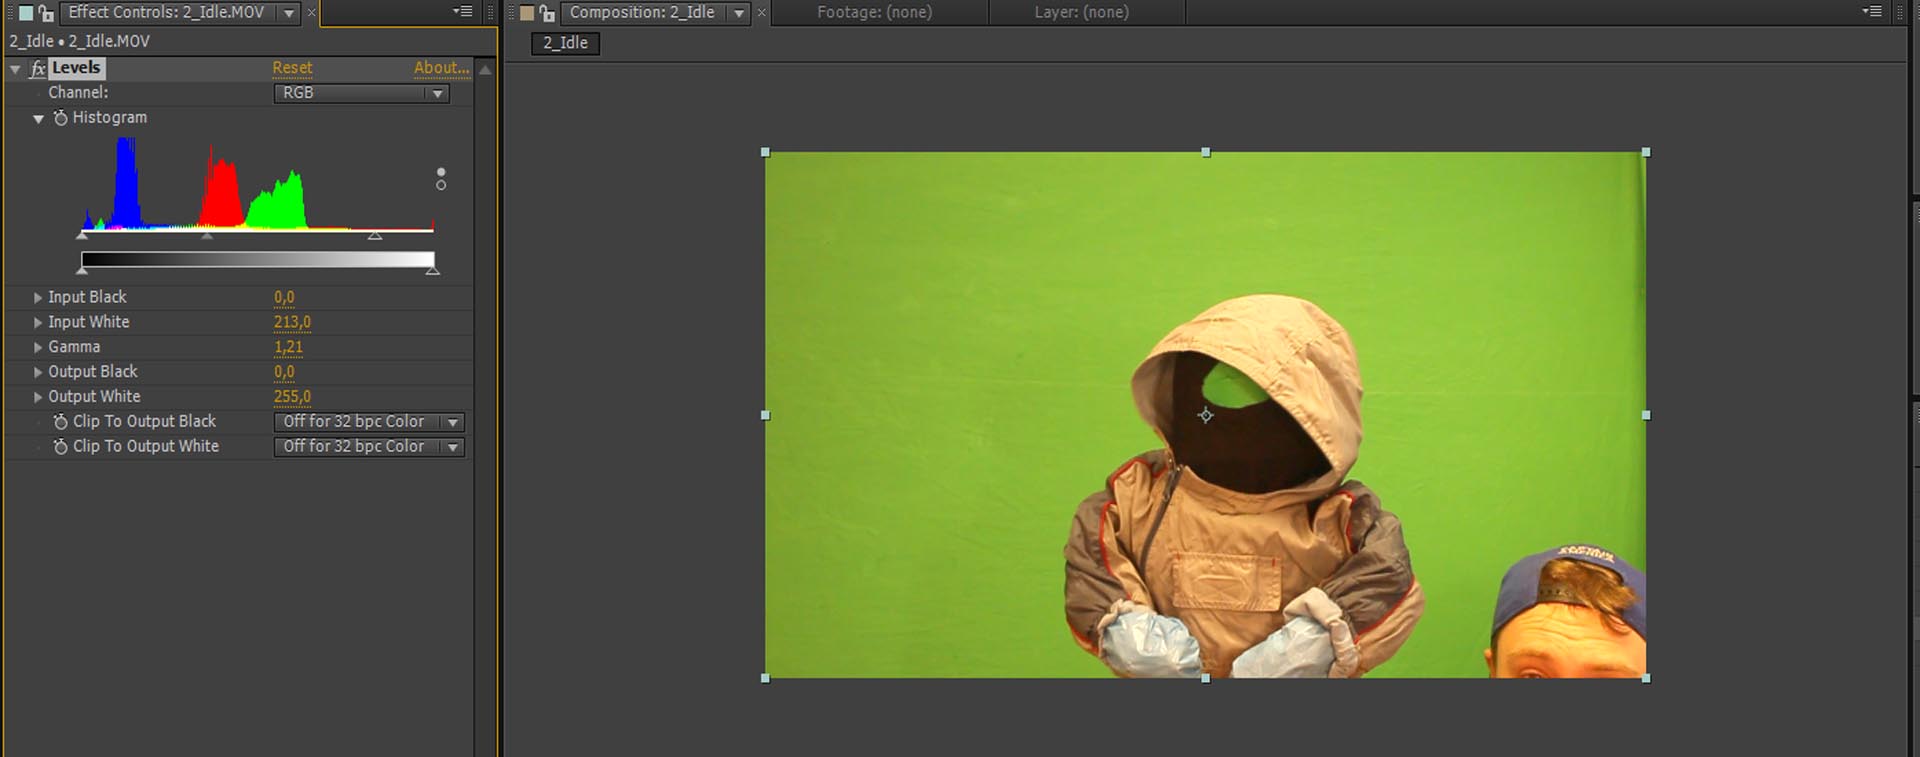 After that we need to boost the greens in the picture and that can be done with the Select Color tool
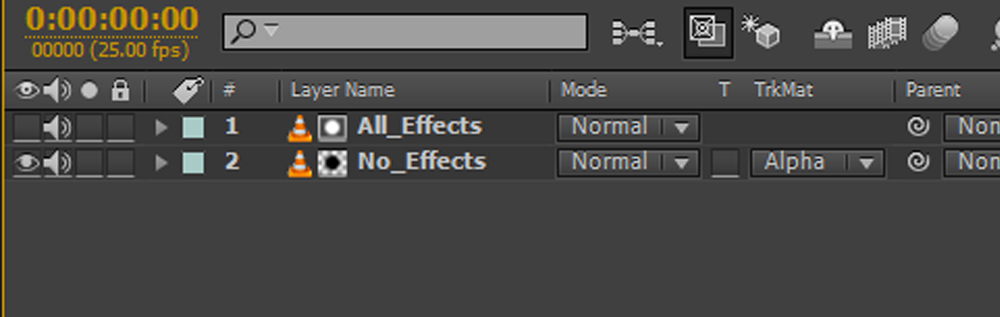
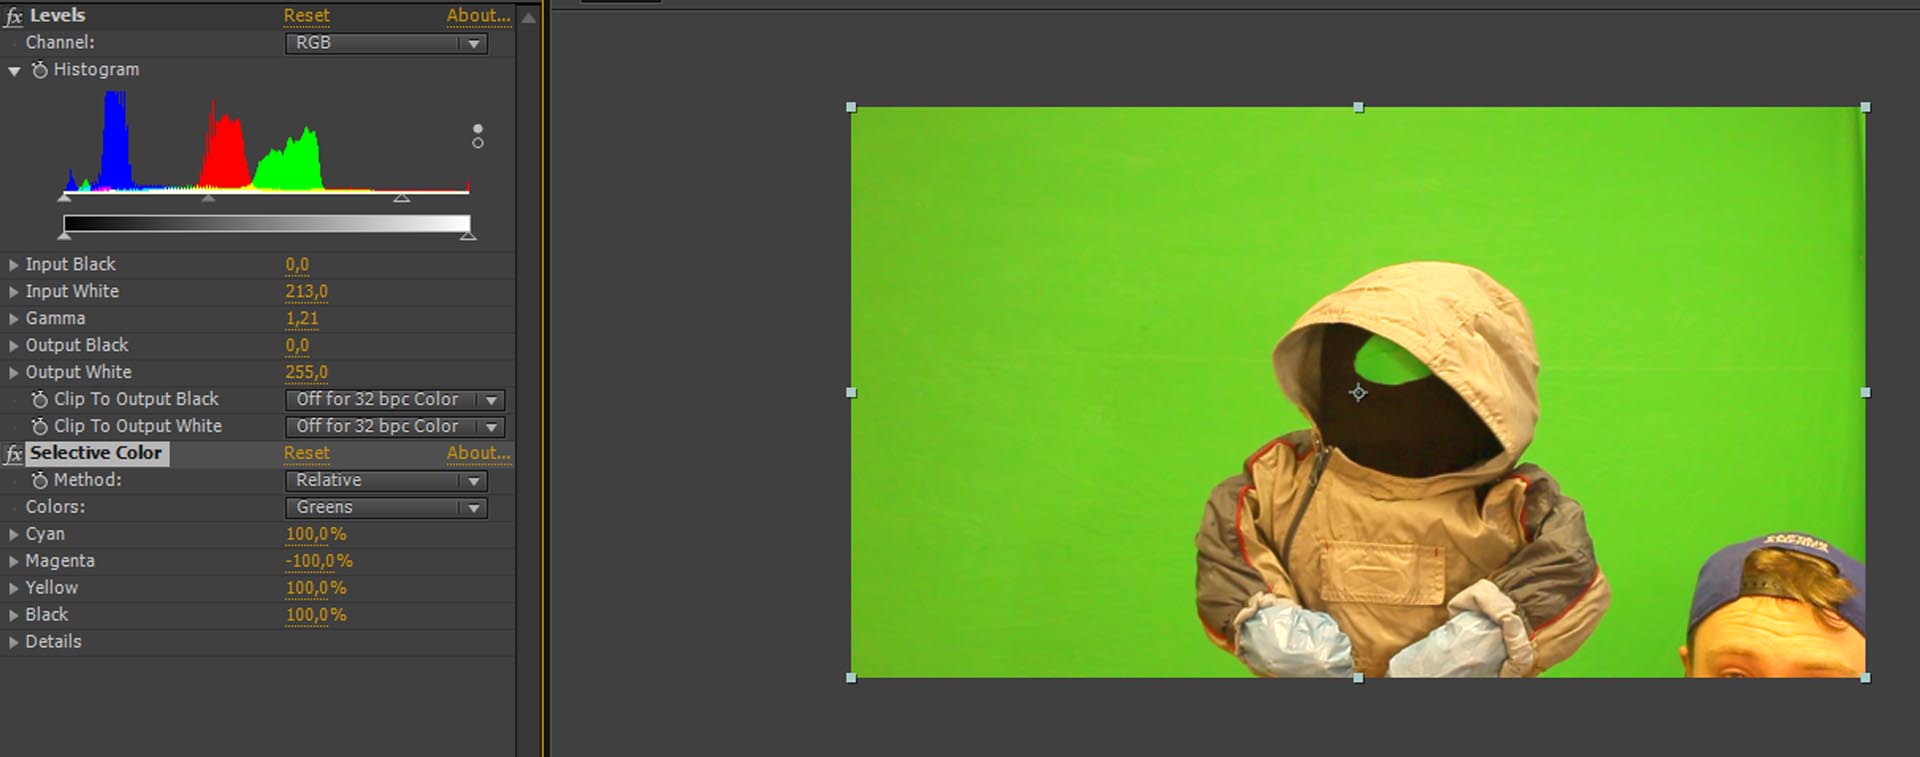 Some people only up the values on the green channel but I find it helpful to poke a bit on the yellows too. Now its time for the fun part! I did the mistake of using the tool Color Key when doing this at first. That sounds like it should be the right thing but what works even better is Keylight. This makes it easier to get in to the shades of greens that appears close to the character.  And that is bacillary that. Now at this point usually make a copy of the layer that I remove all effects on and then I use the effect layer as a Alpha for the non-effects layer. Just to have the character without the carper colors I only need for keying.
This is also the layer I do my masking on to get rid of my bodyparts of parts of the wall that’s in the frame. And that was a bot about my workflow in after effects. See ya!
|