3D class
|
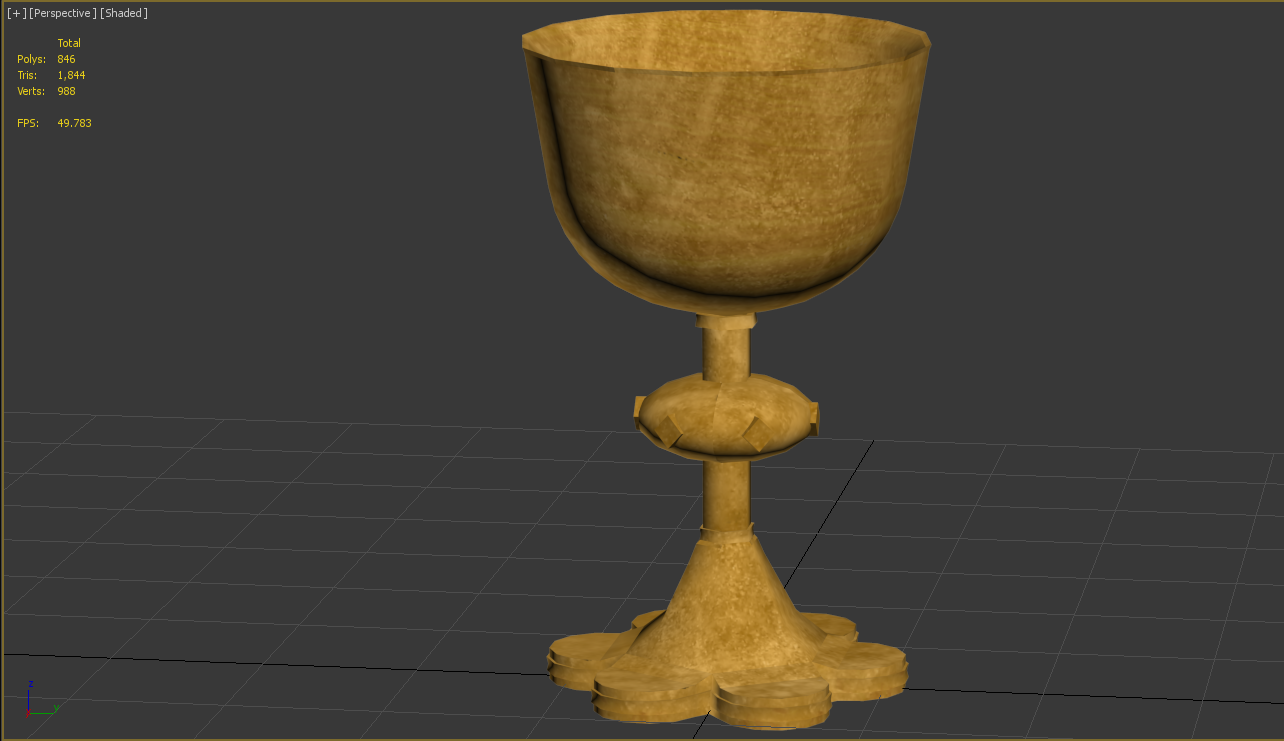
Hello again! Finally I thought I would get to that update about my 3D class. Like I may have told you before, we started with the design of an object from the museum. I chose a goblet that was not too hard for me to model. Naturally I got some help from the teacher.
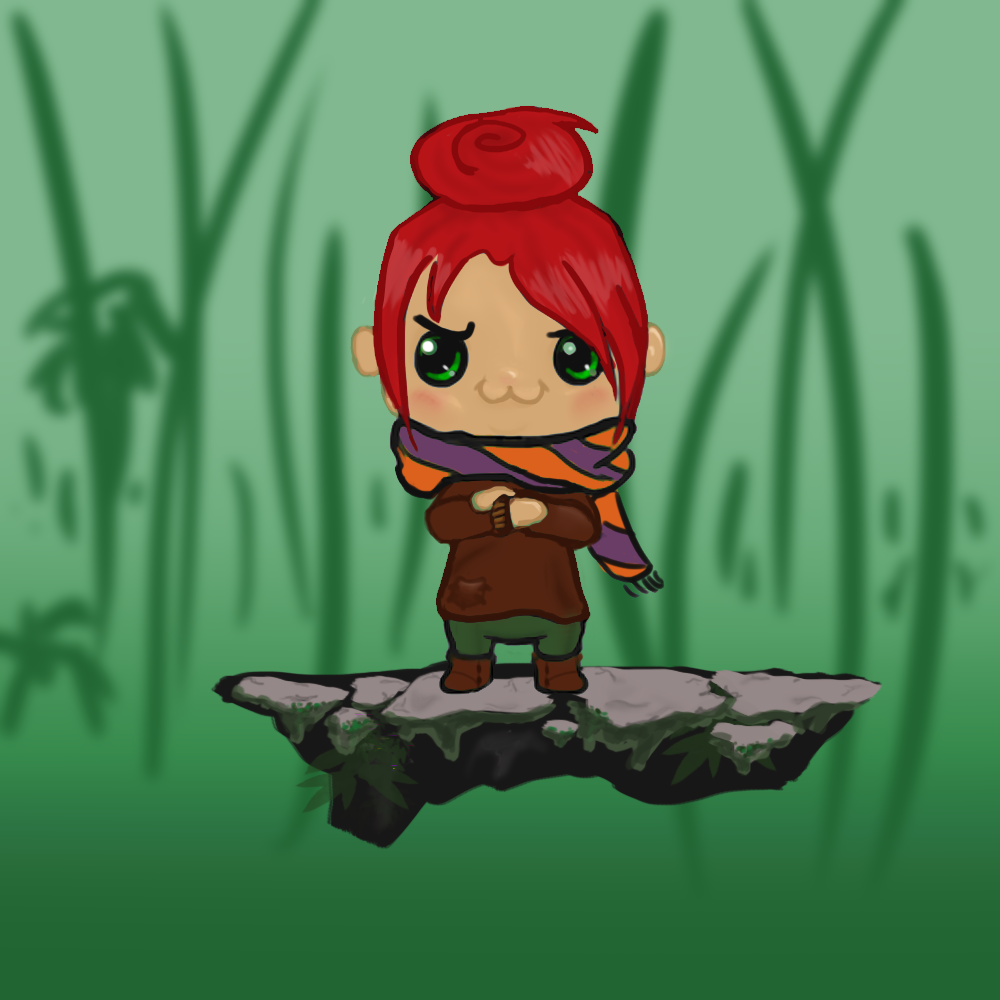
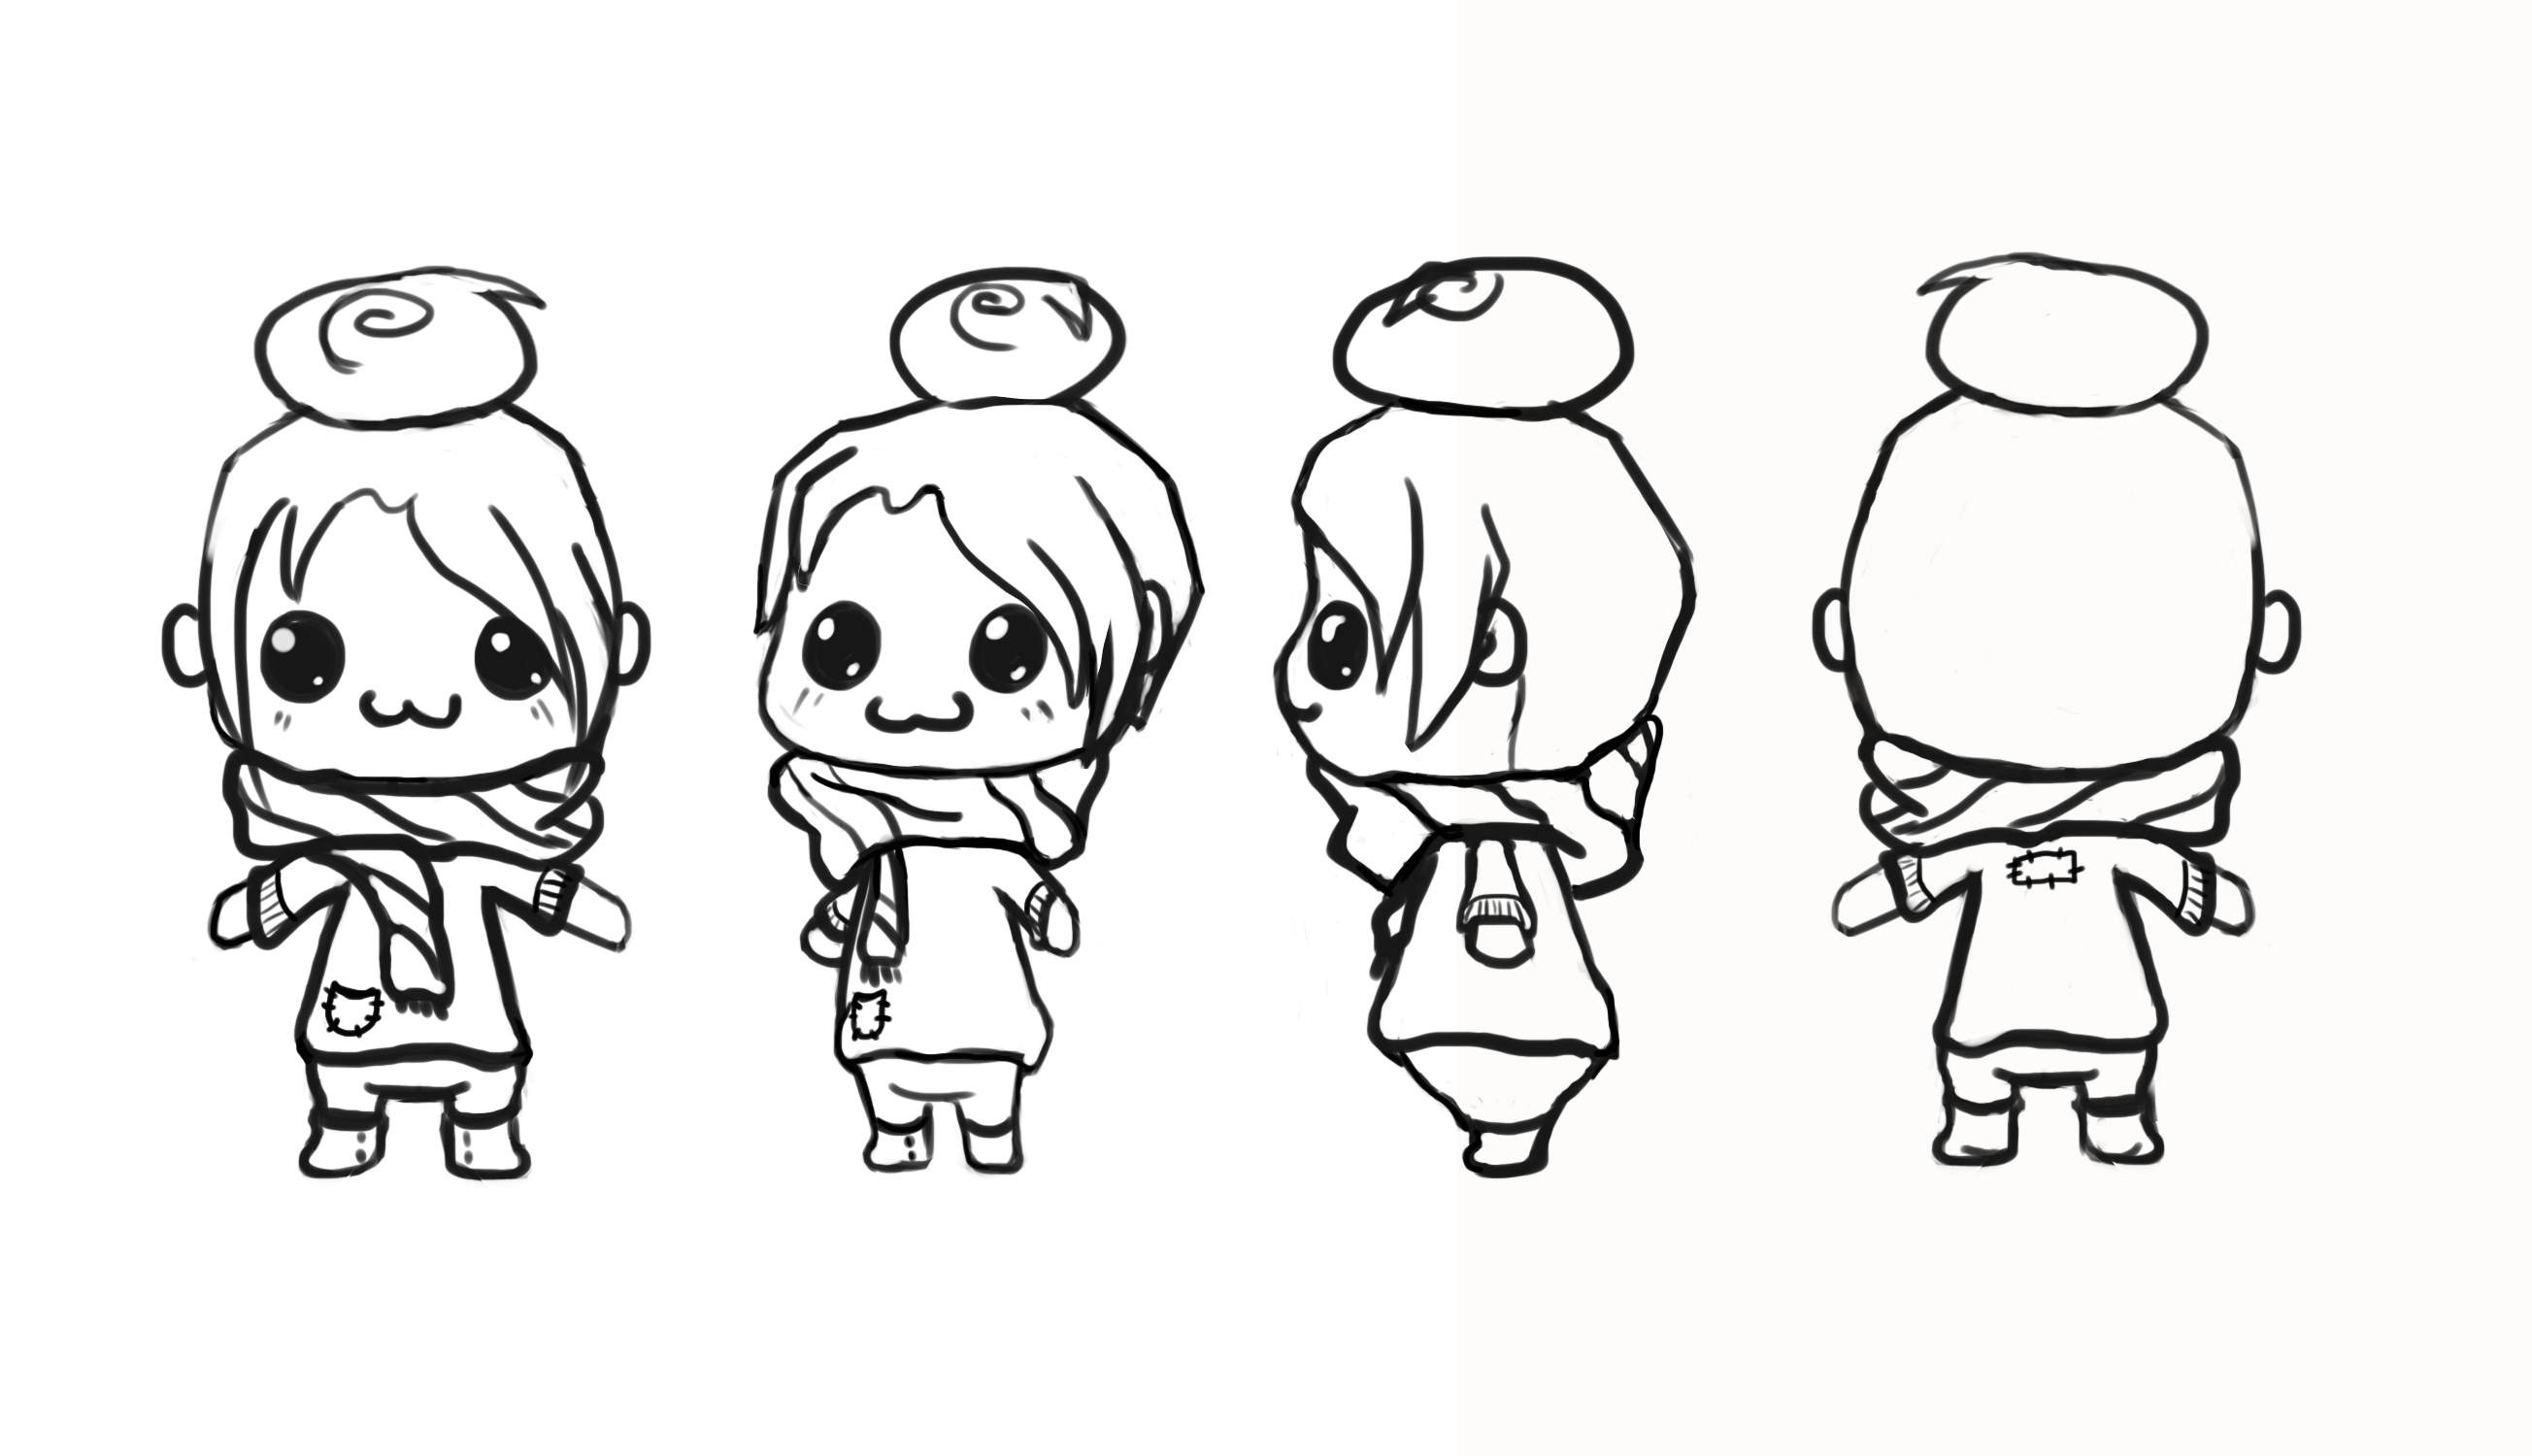
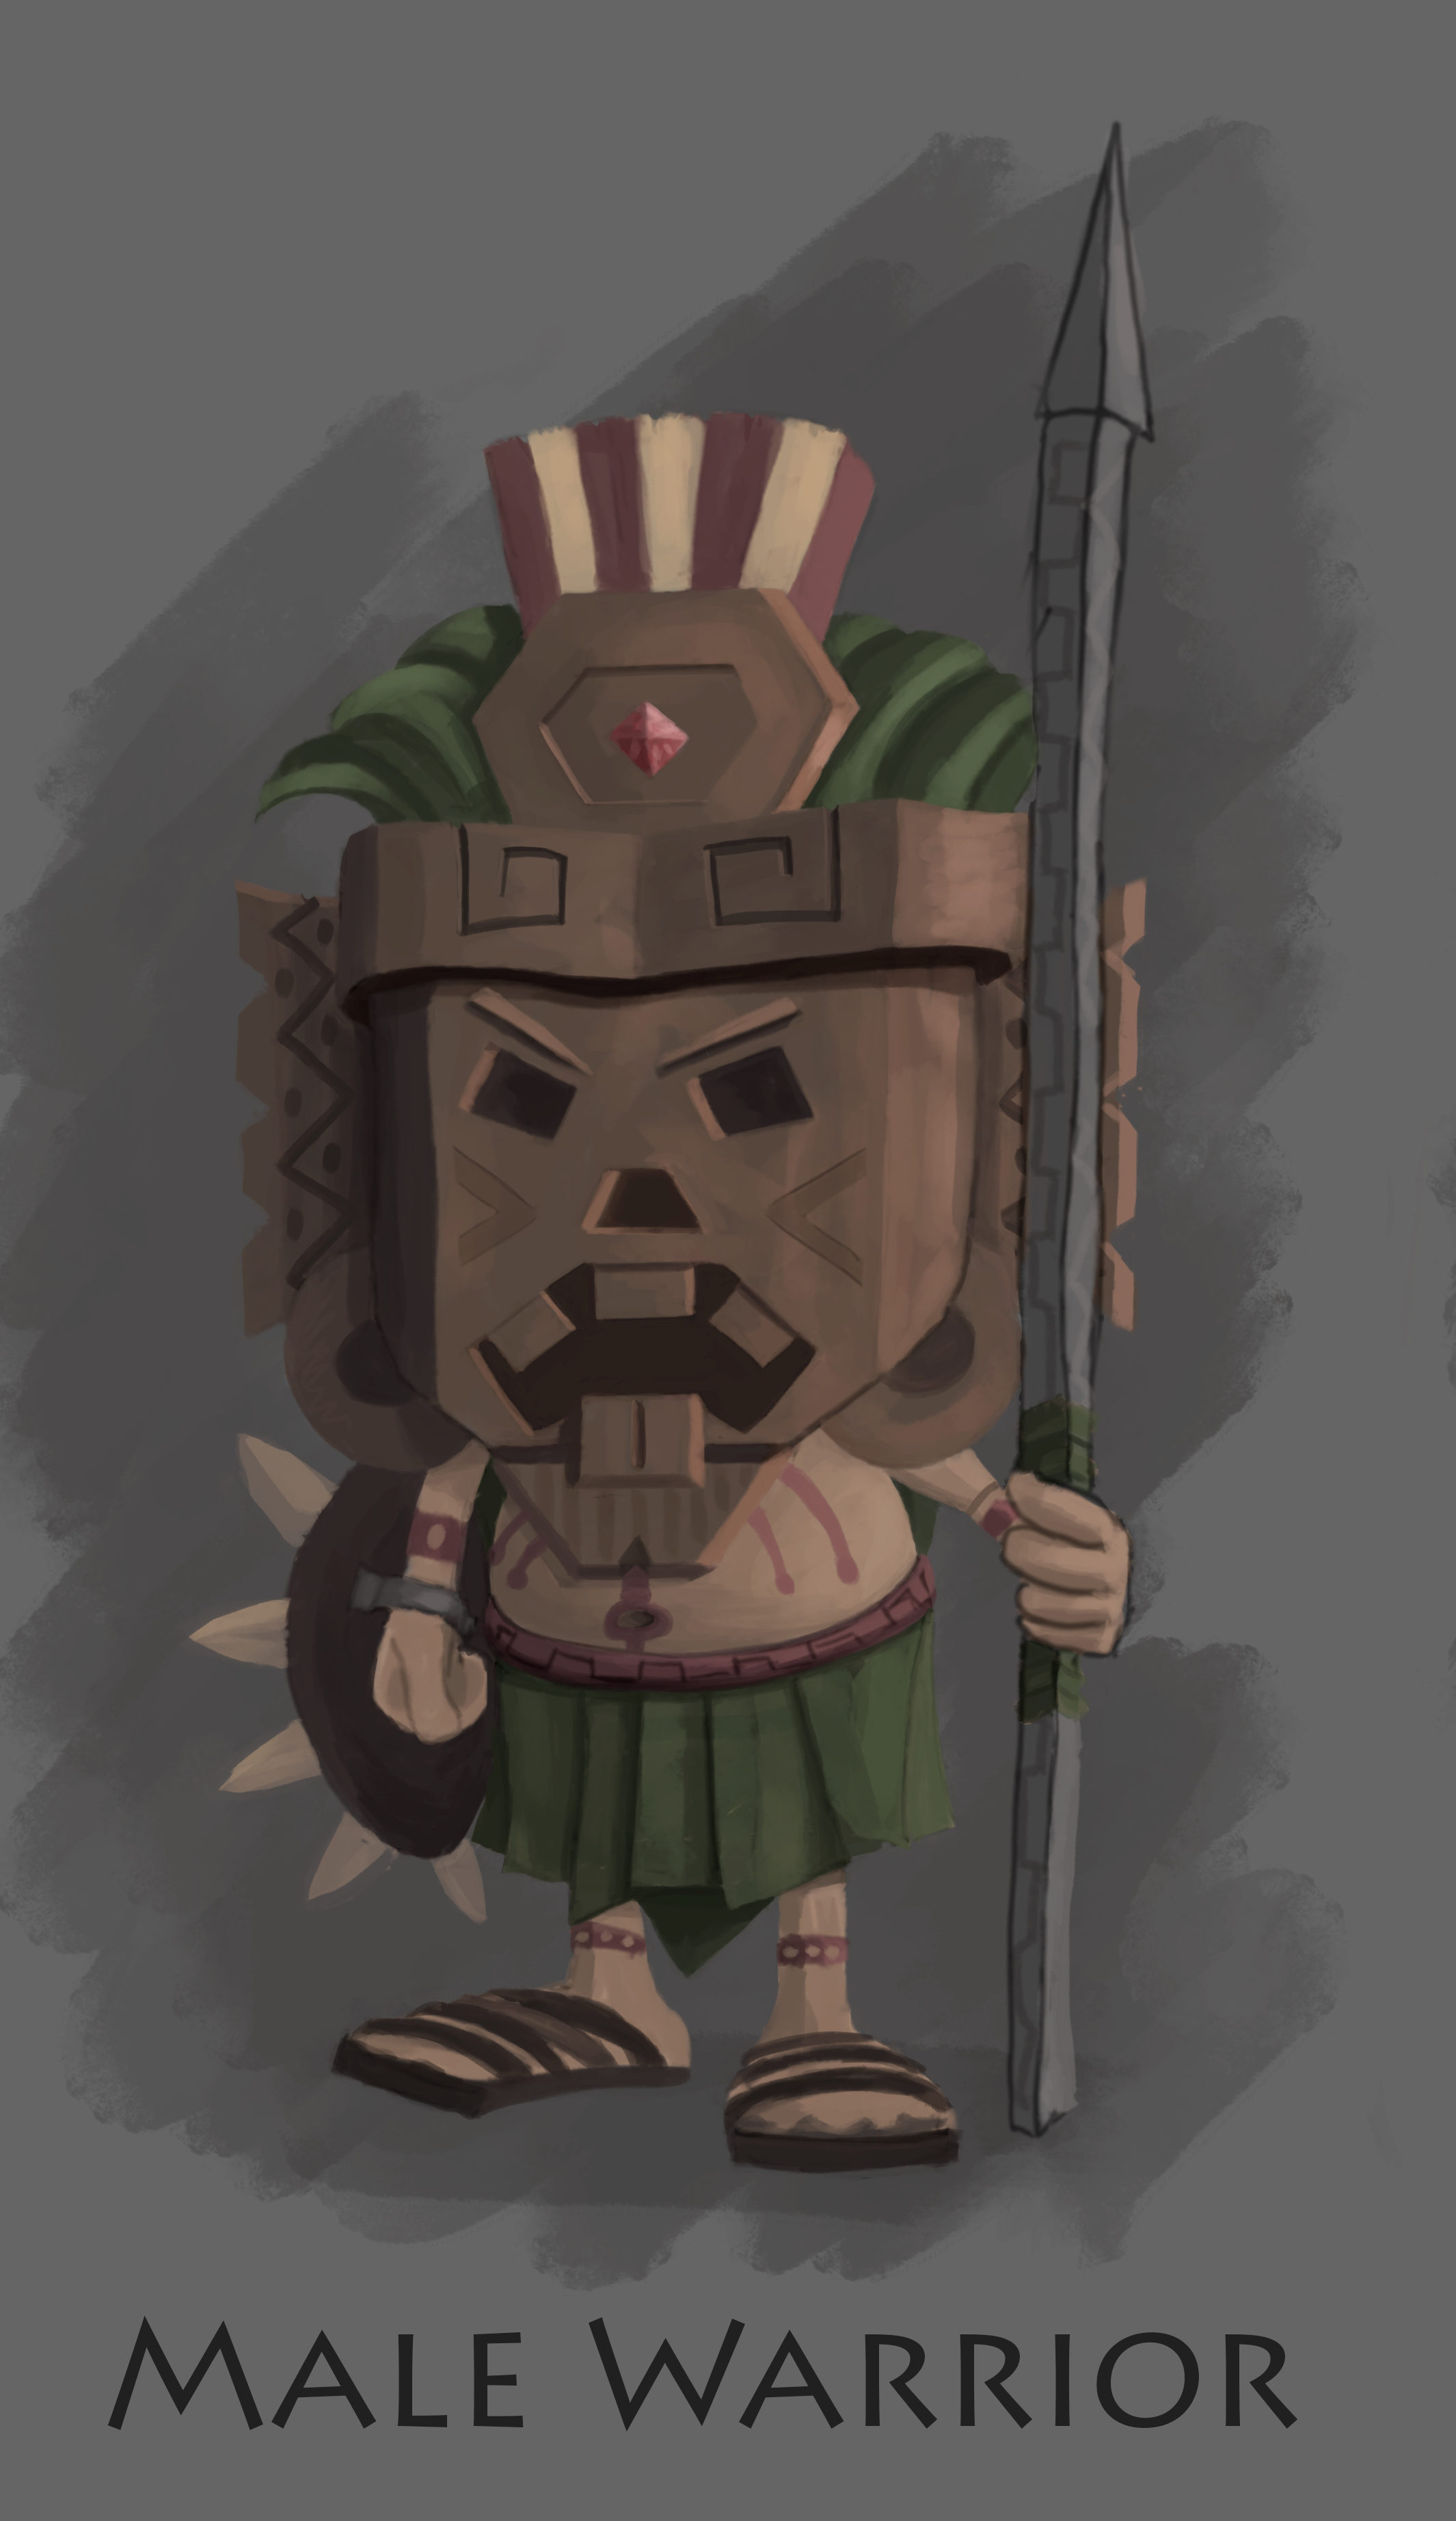
As I were making progress I noticed that some of the building phase gave me troubles in the texturing phase. Depending on how its built the easier or harder it will be to unwrap the UV map. This means that once the object is built you sort of unwrap the shape in to something called a UVW map. Then you paint the map that you unwrapped, sort of like gift wrapping. So if I make a really bad map it will be really hard to try and paint it later and get everything in the right place on the object. Since I were new to all of this I was really bad at thinking ahead. So I did not make it the most optimal. Then we got to our third assignment, the character design. Our first task was to create a character package. This means a turn around, an action pose and information about your character. Everything so that the person that is going to model your character will know what you were going for. It is all to make their job easier. We naturally thought we were going to model our own characters but the teacher had another idea. We were going to model each others characters.Which actually makes more sense. If you are going to be a 3D artist you will most lightly model other peoples characters from a description. The character I created looked like this;
Her name is Fia and she is a tiny inhabitant of the forest.
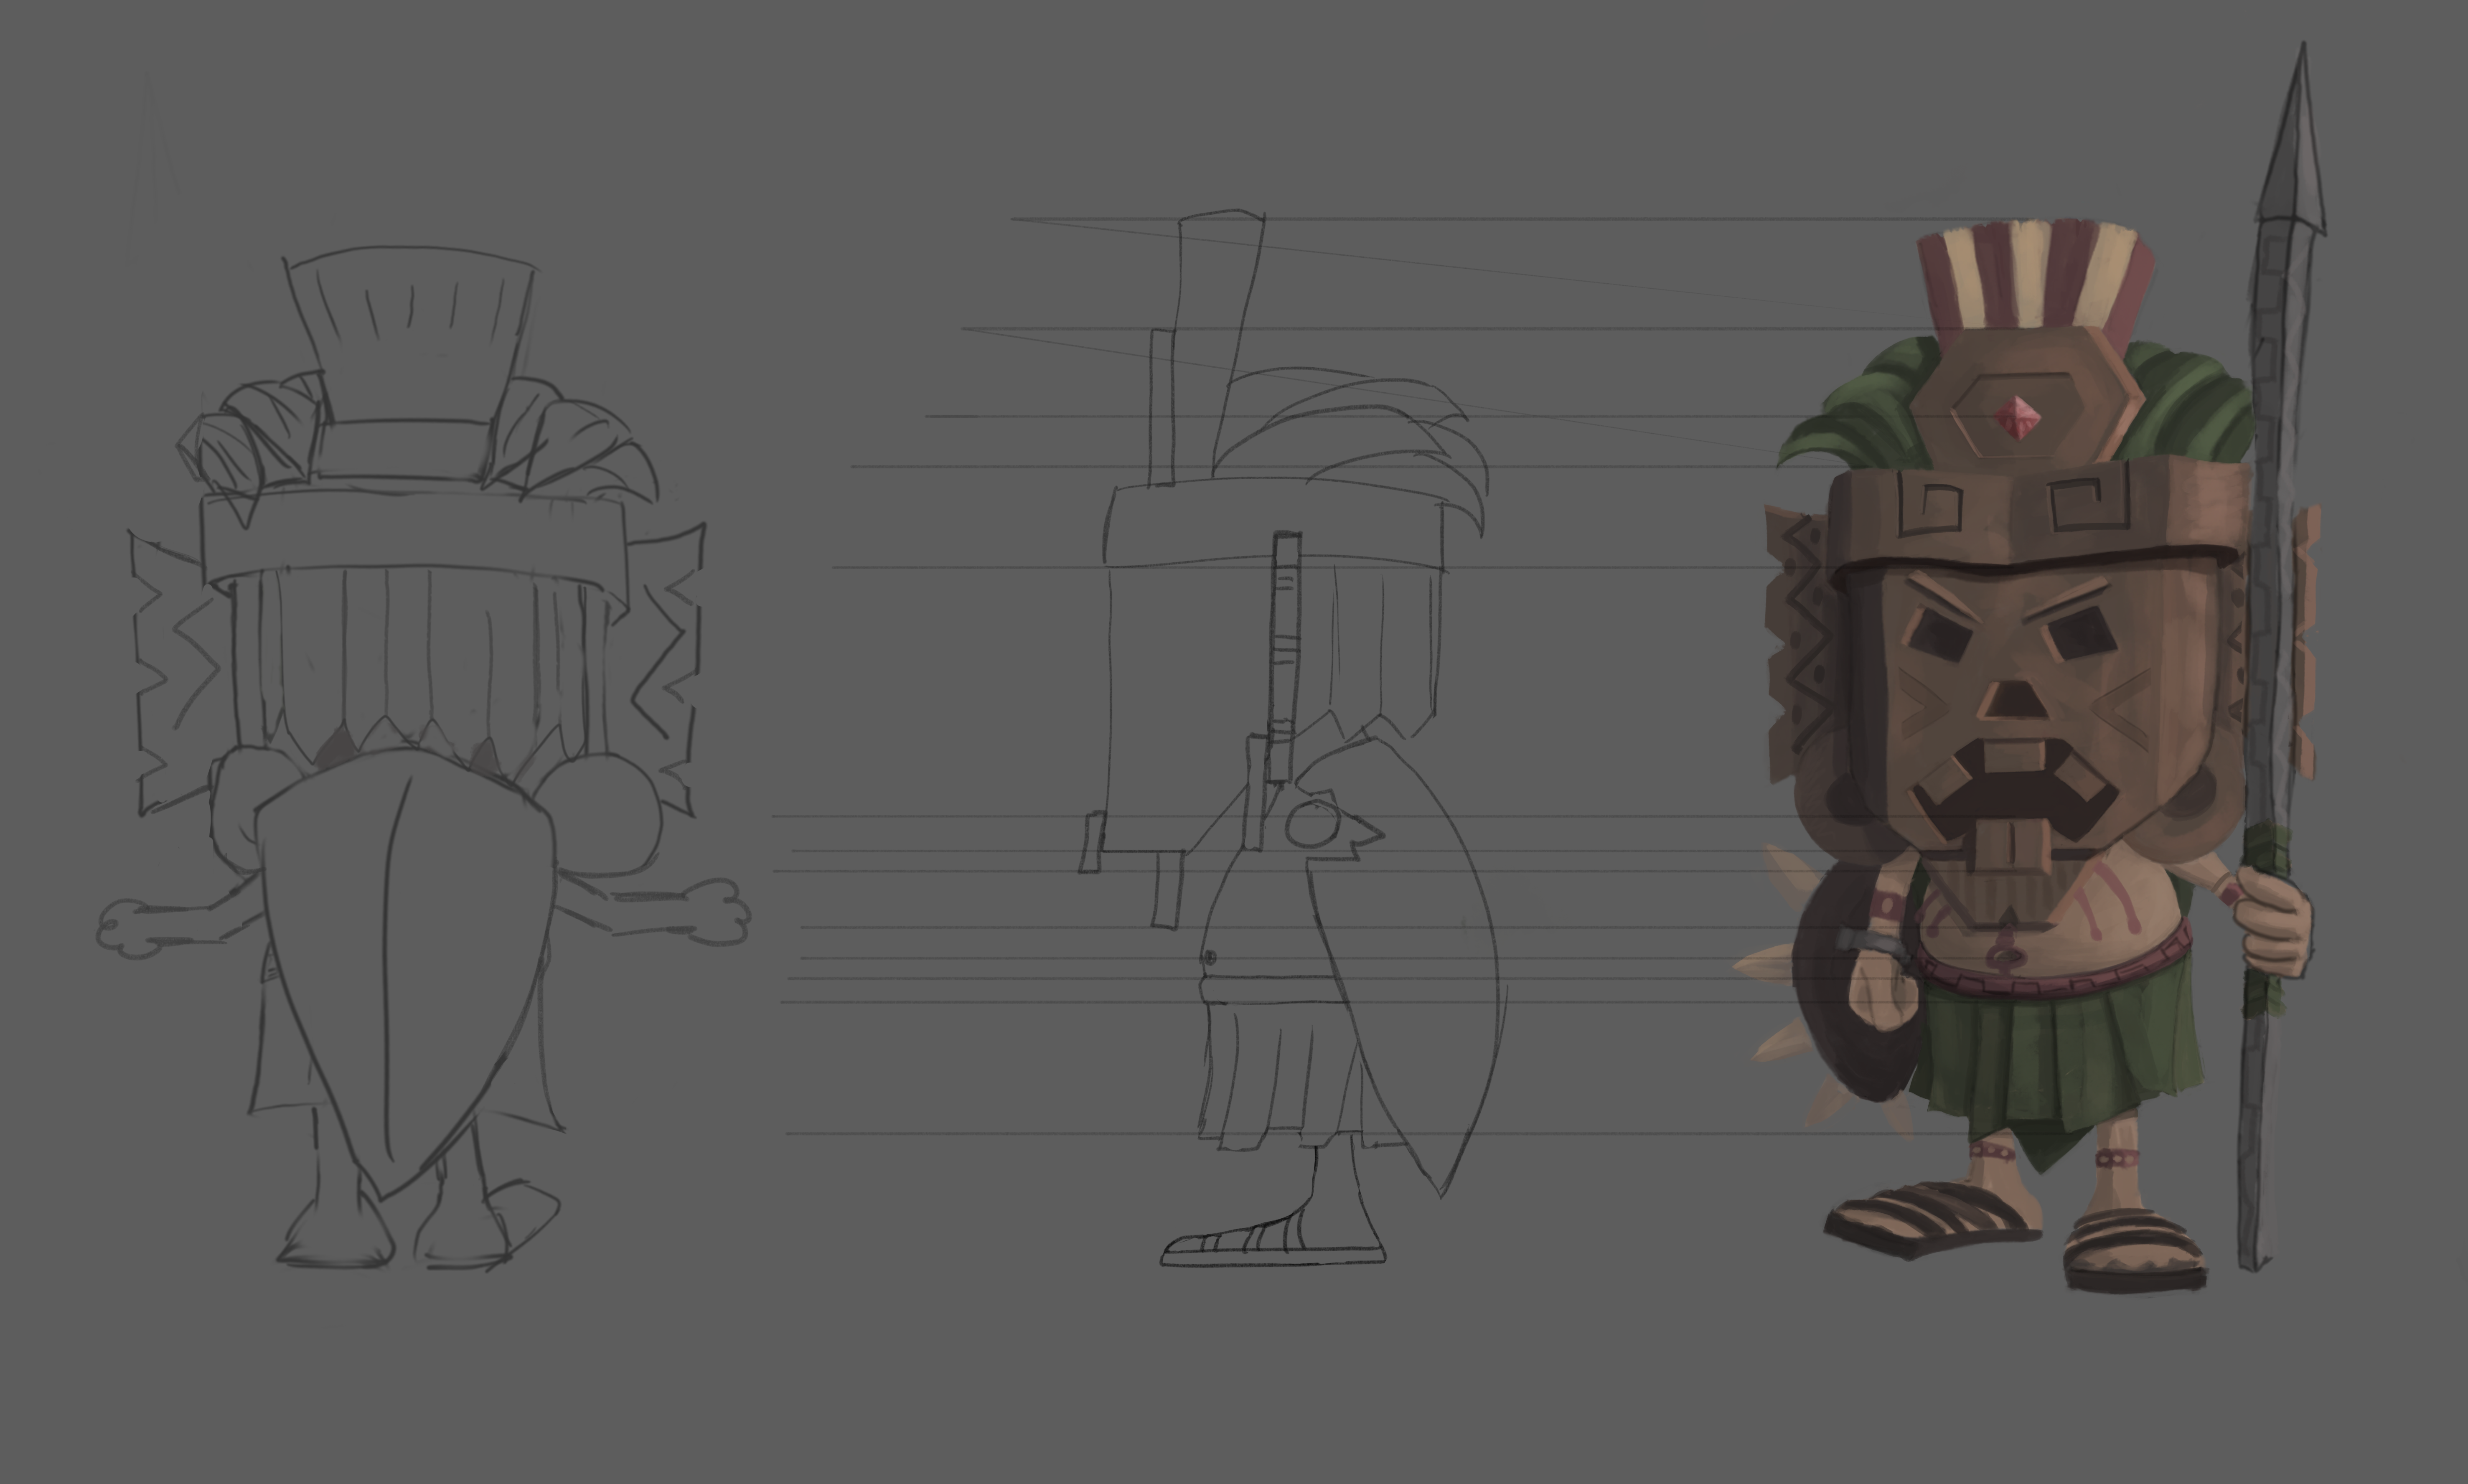
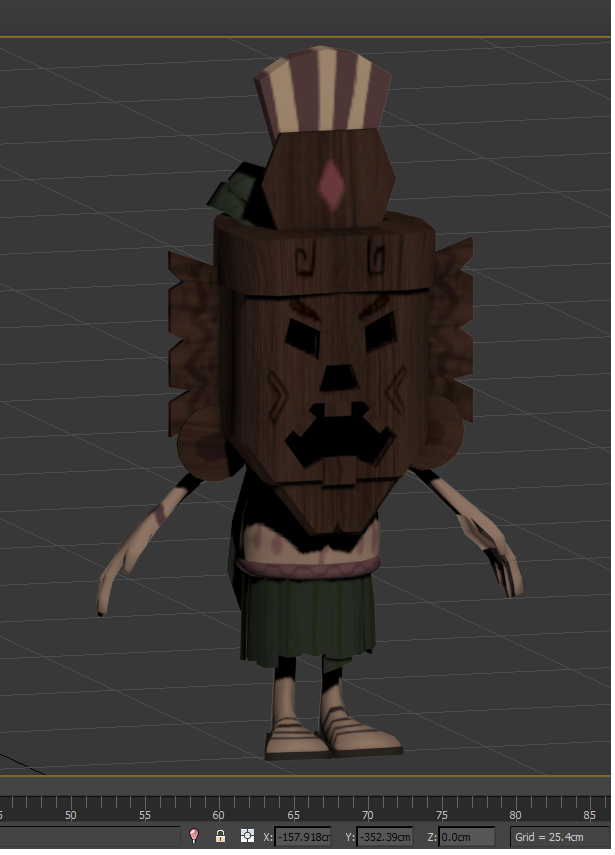
So quite a lot more details. This was designed and drawn by Erik Starrander. He was the most detailed thing that I had done since my only experience was the goblet. I managed to get him modelled with a few kinks on the way. It is a lot to remember when working with a new program. And I seemed to be particularly clumsy when it came to pressing the wrong buttons and messing my program up. But hey, now I know what not to press.. and also, learned to save.. a lot. So here is the finished character model without texture:
With texture which was the next phase:
By the time I were to draw the texture I had lost so much time that I had to more or less slap something on the poor guy. But I got a great experience and will know how to make a better job next time. My problem was still that I had done some mistakes while building which gave me problems in unwrapping. and then that made it harder to apply the texture. For example a tattoo around the arm can be very hard to create if the seems are wonky. As you can see in this picture it is a bit crooked. I will make a better post about the uv mapping and texturing later on with pictures so that I may better explain. Until next time! /Nayomi |