Space Shooter Project. Blog 6. Level Logistics
|
So for this blogpost I am going to go through some logistical solutions regarding our level design. We have so far had a few problems in structuring our level. This is mainly due to the fact that we lack a proper tilemap. Hence we are placing interactive objects through hard coding. This makes moving objects around and testing different level structures very tedious. In addition to this we have certain graphical aspects of our level which needs to correspond with the positions of said interactive objects. The problem which arises from this is that since we don’t have a tilemap, all the graphics are composed of large imagery. So when objects move, the large image which makes up the level, needs to be changed quite comprehensively. The main example of this is vegetables, which we use to award the player score. Since they are located in dirt covered areas while the rest of the map is grassy, every time you move or change a vegetable cluster, the map needs to be altered. So the solution for this is to make a map blueprint which is accessible and easy to use for graphics and programming. So this was the quick fix for this issue:
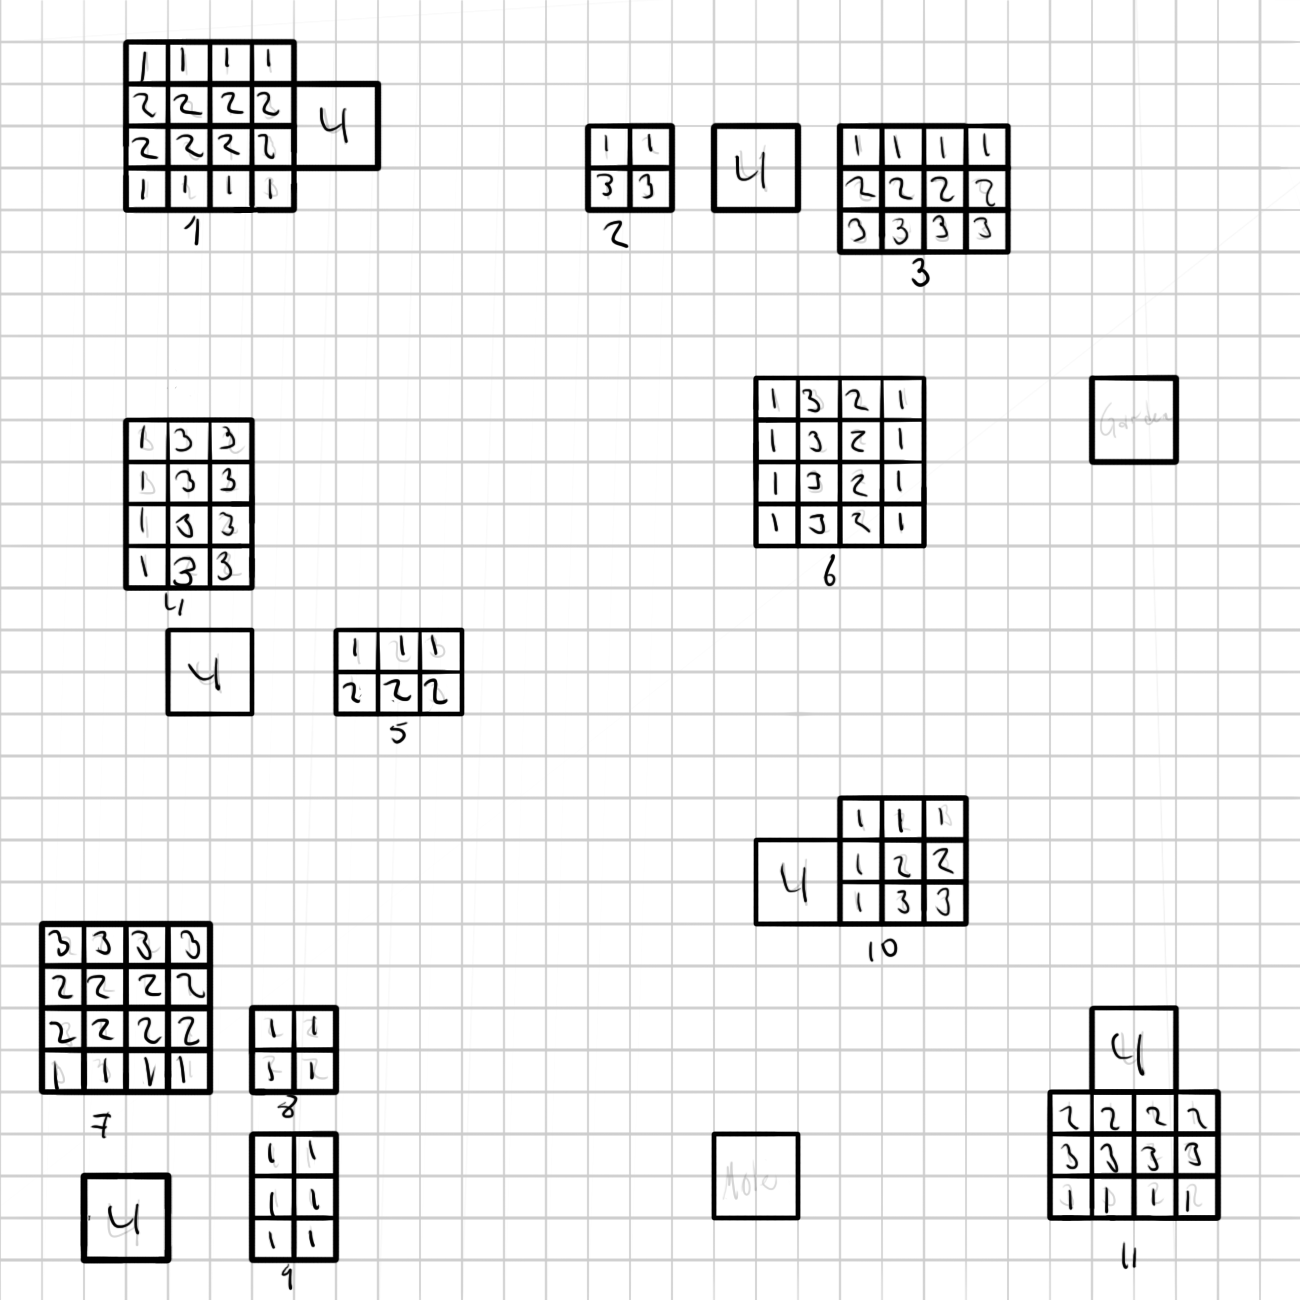
This image is 1300x1300px which the exact size of our level is. The image is then divided into squares of 42x42px. This is because our vegetable has a size of 32x32px with an offset of 10px which makes a vegetable size 42×42. Then all vegetables which are going to be positioned on the map are drawn in as squares with a key number ranging from 1 to 4. Each number representing a specific vegetable type. The only vegetable which is bigger than 42x42px is our winning condition (the prized melon) type vegetable. There is also a starting positions for the Mole (player avatar) and for the Gardener (the key patrolling enemy). So this is basically a graphical replacement for how a code tile map would (sort of) work. The benefits of this is that you can use this image without an alpha channel background as a frame for drawing on. Which means graphically, all you need to do is draw in the vegetable parts exactly where this image has the vegetables positioned. For programmers it is easy to make a TXT file with row positions which is going to ensure that the position of each vegetable ends up at the exact correct spot. So each score cluster has a little number underneath it to separate them from each other. A text file example of how to explain the positioning of cluster number 1 looks like this:
1 – tomato 2 – strawberry 3 – eggplant 4 – melon Example for rows: 1,(4) x, y, – y plant type, (amount) x, y position, – row direction SHEET: cluster 1 1(4) 126, 42 – x 2(4) 126, 84 – x 2(4) 126, 126 – x 1(4) 126, 168 – x
So as a programmer you simply take the x and y coordinates and position said vegetable type the amount of times listed in the bracket along the said axis, in this case the X axis. Blueprints for positioning of interactive objects in the underground exist as well, albeit not as crucial as the surface one. This for the simple reason that the graphics don’t need to correspond with the objects positions in the same way. That is all. |