Space Shooter Project Blog: Post #2
|
Alright, another week has passed and additional pieces of the levels have been created. This time I will cover the next section of the game. Being the dedicated level designer, I don’t really do much outside of building the levels. Anyway, moving on.
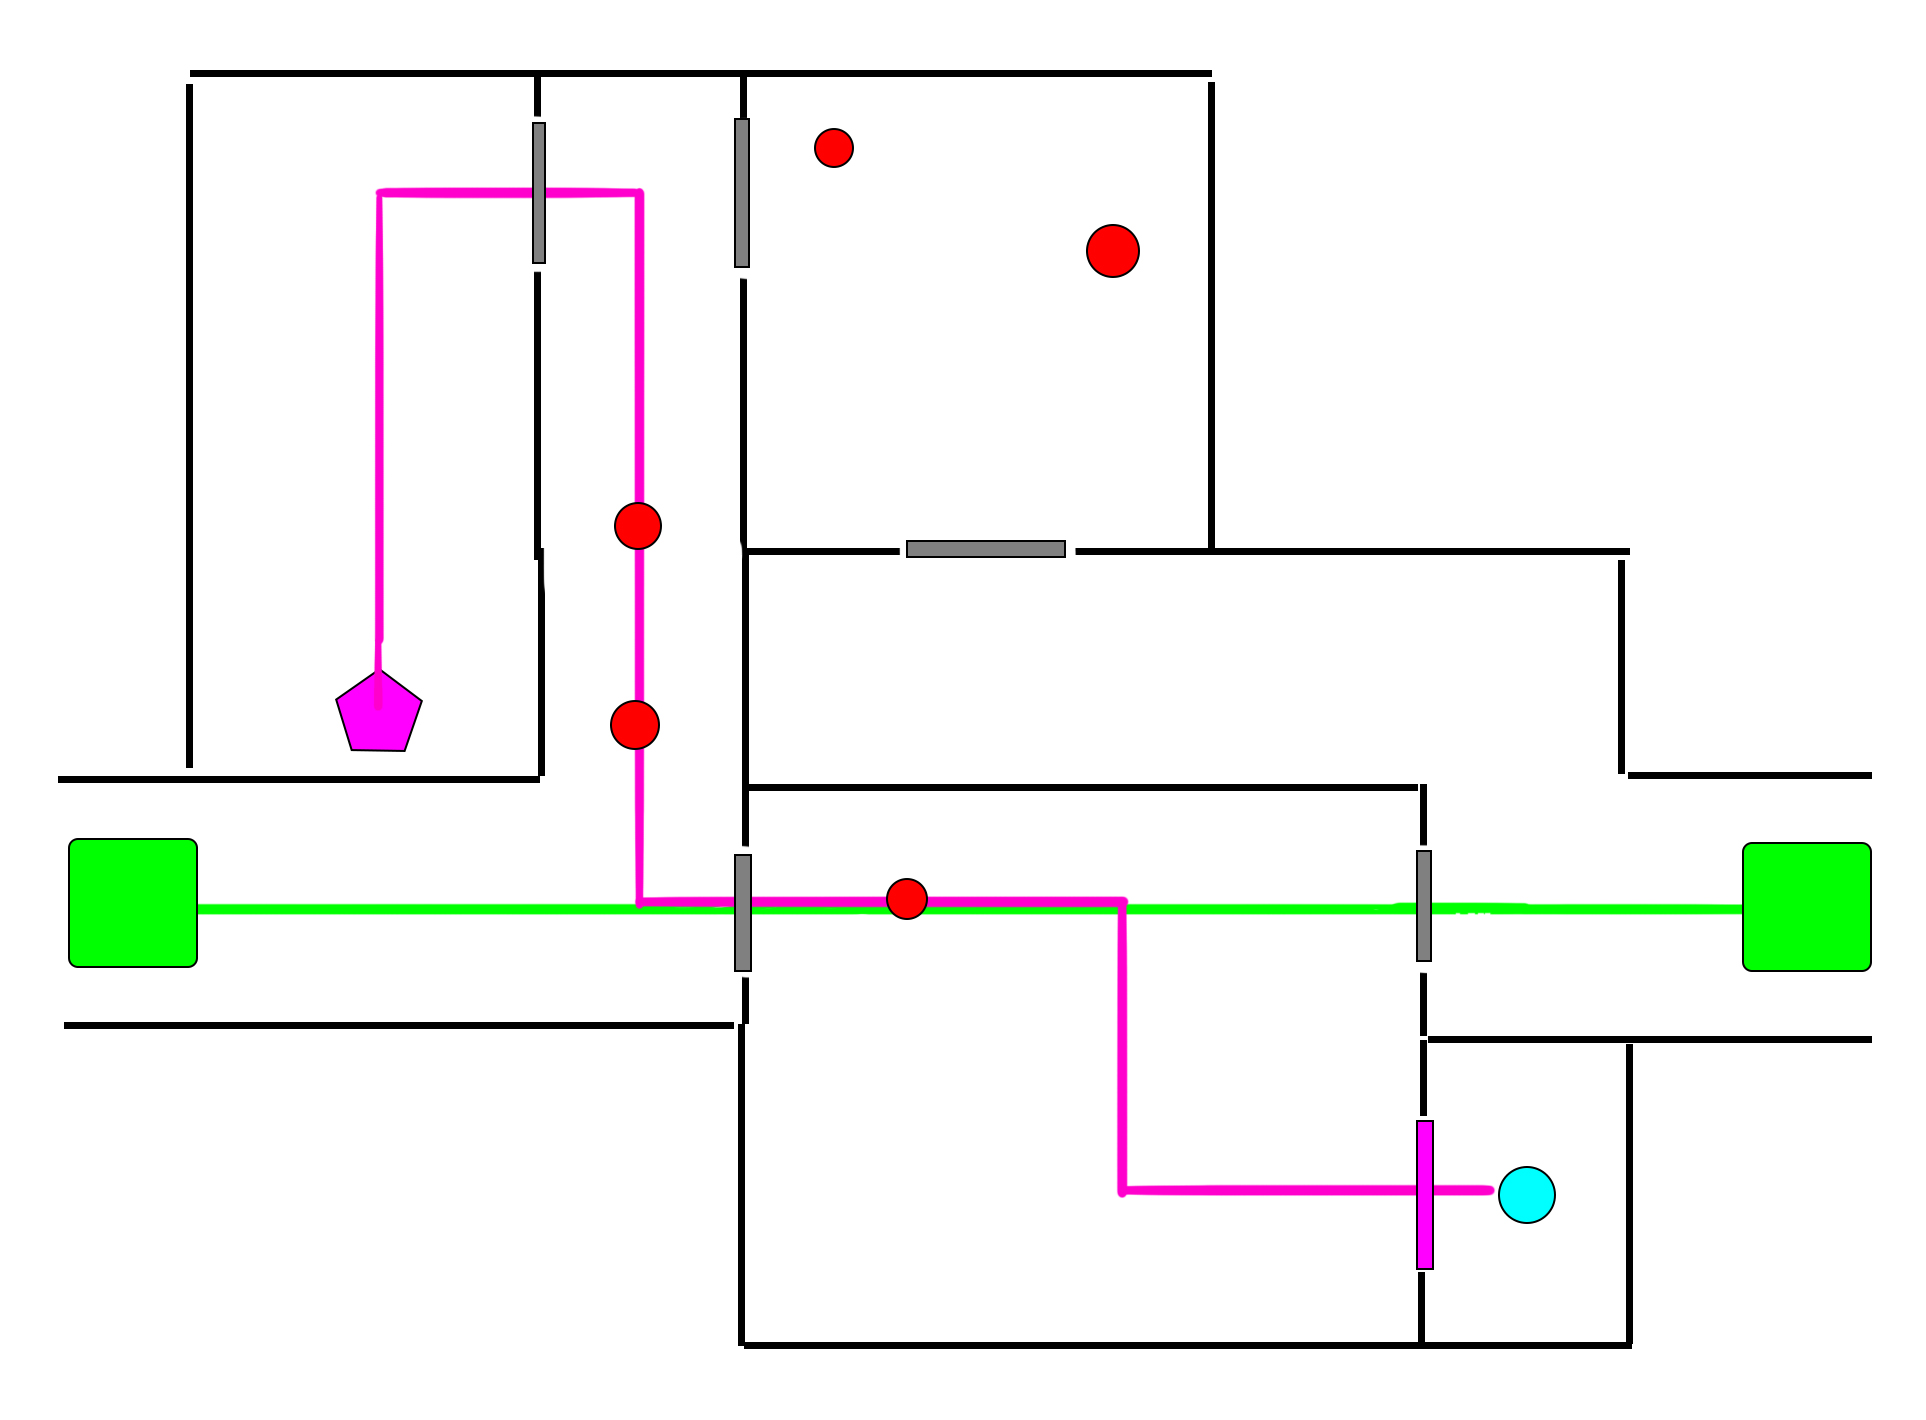
So, here comes the part where I feel I have to repeat some of the information from my previous post, as whoever you might be that is going to read this blogpost, might not feel like looking up my last post to find out what this above image means. Basically, this image shows how the level is designed and where all the crucial elements go, and it serves as a blueprint for me while I design the level. Any structural changes to the map can quickly be done in the image file before being built in the actual map, saving time when I need to show my team any alterations I want to make.
There are some other representations I use in my level blueprint, but since they are not present in this section, I don’t feel the need to cover them. Now that all that info is out of the way, let’s move on to the recent changes I’ve made. During the pre-alpha, I noticed a lot of people were having trouble navigating the corridors and had very little space to maneuver in the larger rooms. So for the sections following the first, I have redesigned the map to have wider corridors, larger rooms and bigger doors. In retrospect, I should have forseen this considering the floaty controls of the player character.
So, in the remaining sections of the game, all corridors will be 4 tiles wide as opposed to 3, doorways will be 2 tiles wide as opposed to 1 and rooms will be enlarged as well. After doing some additional playtesting, I have come to the conclusion that this change was for the better, as I would very rarely get stuck anywhere, and fighting the enemies became somewhat easier when I could drift for a longer distance instead of bumping into a wall every 10 seconds. And here we come to another thing I will likely have to bring up that you, the reader might not want to look up in the previous post. That is the way the sections are designed.
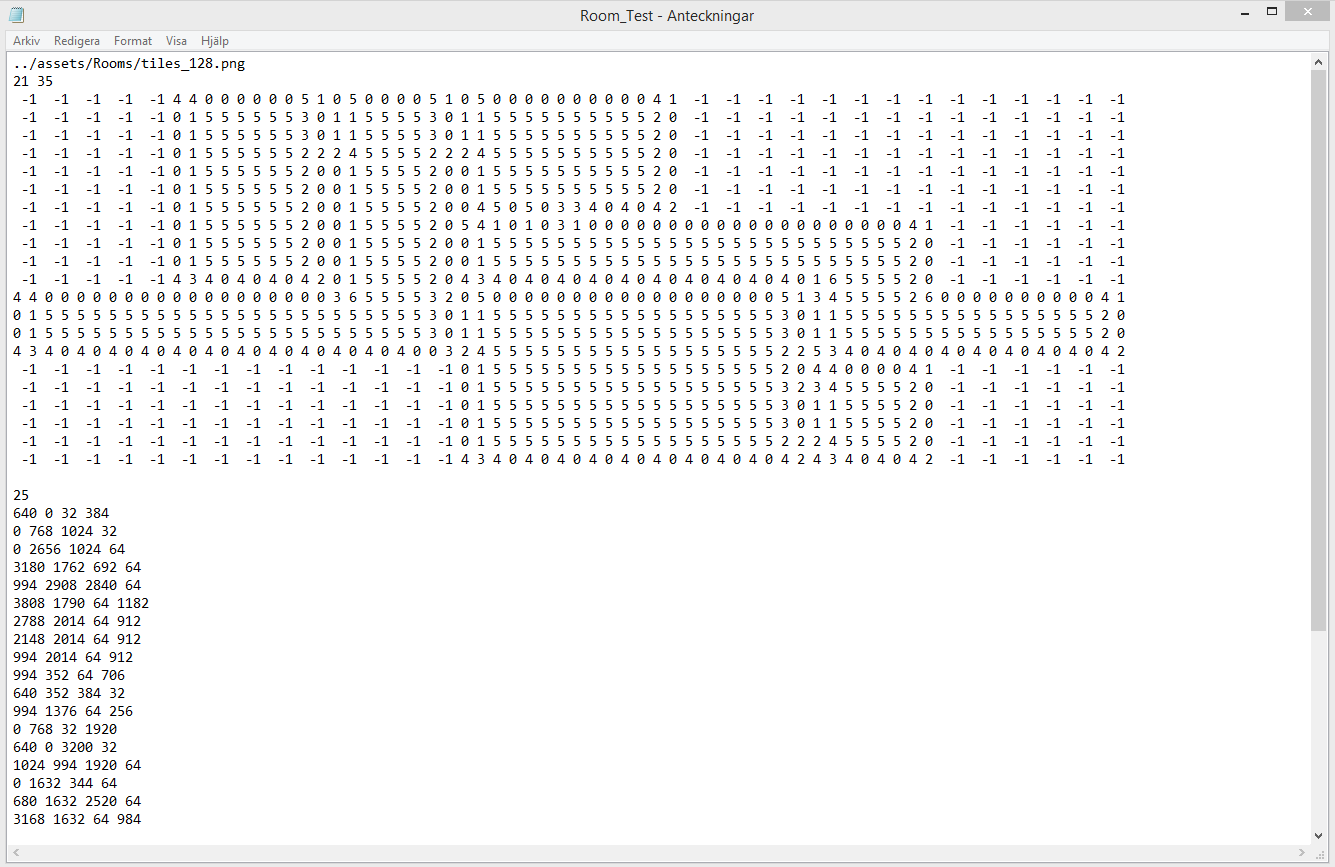
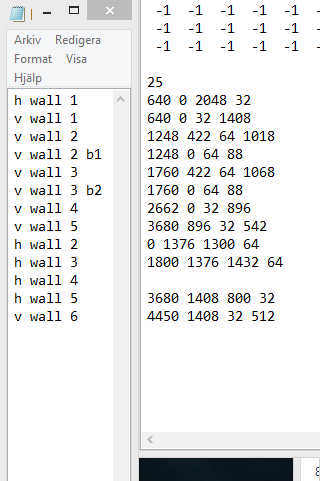
Each section is built with tiles and has a separate text file, where the information necessary to build the level is stored. The top row tells the program which image file to use the tiles from and the second row determines the vertical and horizontal size of the level. The huge wall of numbers that follows tells the program what tile to place where. ” -1″ means a tile space is empty, and any other combination of numbers determines what row and column in the image file to take the tile from. For example, ”x y” means the tile that occupies that space is taken from column x, row y. The lower half of the text file says where to place the hitboxes. The initial number determines the number of hitboxes, and the following sets of numbers are the coordinates x and y, as well as the horizontal and vertical width of the box, in that order. Following the list of hitboxes is the list of enemies. It is sturctured the same as this list, except it doesn’t require the height and width, as the coordinates for the spawn point is all that matters. Previously I was having quite a lot of trouble working as I constantly forgot what hitboxes went where. Adding notes next to the numbers will cause problems when the game is started, so I did what I should have done from the start… I created a separate text file, that I can simply align with the hitboxes to find out where they are.
That’s all for now. Time to get back to work. |