|
Sprites is the subject for this week. I will present and examine the ones I´ve been working on during the week. I´ll try to cover the process in as much detail as possible and give you some tips and ideas that helped me along the way.
So here are one of the sprites I made this week, shown as an animated gif to give you an idea of what the end result may look like. As I´m sure there are more than a few ways to go about making one of these, I´ll simply guide you through the process I´ve used. First off, have a clear idea of what you want to do before you start doing it. This may seem obvious, but as animation can take a bit of planning, it might be a good idea to just make a quick sketch on a piece of paper before you get going. Generally this goes for more complex animations than the one I´m going to show you, but it might be a good habit to build. Now create the first image. In my case this was the electric explosion just upon impact. To come up with this image I made a quick search on the internet to get a sense of the color and behavior of electricity. I then simply made a new layer (make sure it´s set to transparency) and painted the electric ball.
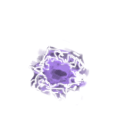
For the second image I copied the first layer and increased the size of it. I added some paint with the brush tool, but another way to do it is to use free transform tool to easily modify the size. I also added some sparks around the ball, again with the brush tool. There aren´t really any rules to this, just make sure it looks good to you.
Same thing again. I copied the previous layer and continued to add some size and sparks to it. When using very light colors like I did, you might want to add a new layer at the bottom (or use the existing background layer) and paint it black. This will make light translucent items easier to spot, compared to the standard white background.
Now it´s time to start using the timeline. In photoshop it can be found under the window menu. Click create new frame animation and you should see your layers displayed in the timeline.
Now, simply adjust the layers in the order you want. I my case I wanted the smallest image first and the largest at the end, creating the look of a growing explosion. You can edit the length of the layers depending on how long you want each frame to last. In my case I wanted my three images to be displayed right after each other, each lasting two frames. When you are happy with your result, go to File, and choose Save for Web where you can save your animation as a gif.
Thats it! See you |