Game Development Blog 2.
|
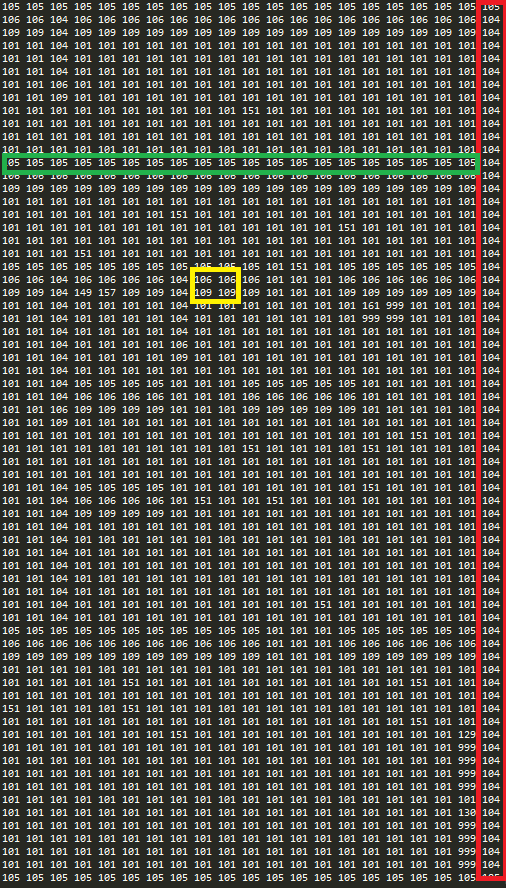
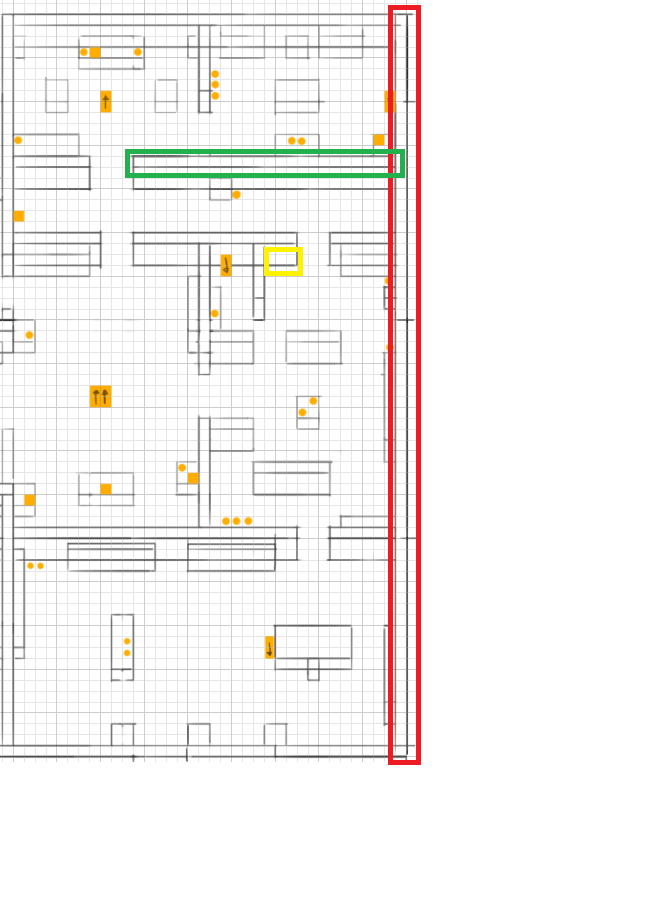
This week I will be talking about the level design we did for the ALPHA playtest. This week, the 16/2- 2015, we had a playtest for our classmates in order to recieve feedback on our games, as well as what could be done with them, to see things from another perspective. As we did not have a proper level in the game yet, but had one design finished, we decided to implement that design in the engine previously than intended. To do this we had to use our Lead-Codes .txt-file in order to construct the map in the game. What you get then, is a column-and-row system that represents the entire map in tile-name style. Every number is a representation of a tile. For Example: 105 is a horizontal wall-tile, 104 is a vertical wall-tile and 106/109 are the upper and lower texturized wall tiles for collision and looks.
My personal feelings for this way of creating the map notwithstanding, its quite effective when you have all the items implemented and the map already laid out in the file. However, as we were short on time in order to finish the level before the play-test, I had choose part of the map for the playtest and implement the rest of it at a later date. This decision was based on the fact that a 1920×1080 pixel resolution screen cannot compress the numbers on screen small enough to fit the entire level logically. What you end up with is a hodge-podge of numbers that ceases to carry any meaning to you logically. We realised we will have to finish the level in either 3 stages, or use a 2560×1440 resolution screen or bigger to finish it. Looking at our whole level, and comparing it to the .txt-file, you can see in the colored sections that they match up.
So, due to the technical limitations to the .txt-tile we could only fit 1/3 of the entire level into the playtest. |