ARTEFACT 1 – PARALLAX ENVIRONMENT
in BAT the Game
Four weeks has passed since my team 12 and I started the Space Shooter Project “Heartbeat Bat”. The original concept was designed by Team 7.
For this project I was assigned the role as Lead Artist. My responsibility lies in creating the visual appearance in our game. However since we are only two artists in our team we decided to devide the working tasks. I got the environmental tasks and everything that comes with it like traps, enemies and obstacles, and Tara my coworker has the task to create the Avatar for our game and the GUI and HUD.
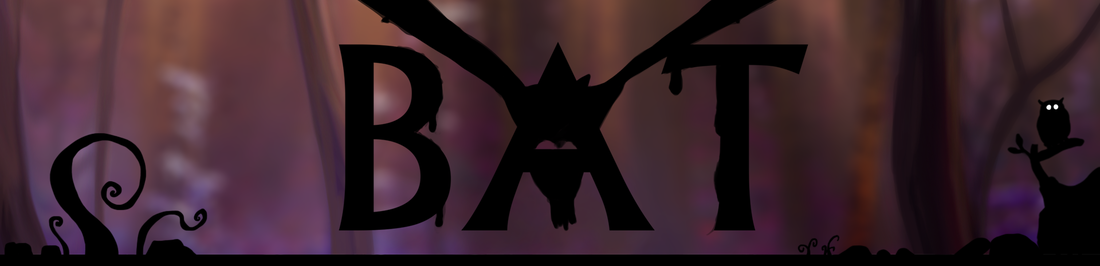
For this week’s first blog assignment I thought I would tell you about the Level Environments I have been working on, these past two weeks. Except from the environment I have also been busy working on trap and enemy animations (Owl, Hawk, Stalactite, Gayzer, Spider and Cob Webs), obstacles for the second and third level, Pickups and Powerups in the shape of Fireflies and the Game Logo. But these artefacts I will tell you about in future posts. So let’s start with the environment we decided to make a parallax.
What is a Parallax?
Since we are only allowed to create 2D games for this project and still want to add some depth to the feeling of the game a parallax is the solution. By parting the background into different layers (mostly front, middle and back) and make these parts scroll faster in the front and decrease its speed and saturation the further back the layer is placed, you can create a depth illusion. With help from this illusion I was able to create depth to the environment in BAT the Game. It was not a easy task since I am more used to just draw environment and not having to worry about the layers to scroll past each other and fit in without any holes and blank areas accidentaly showing.
Level Environment
Level 1 – Tree Top Forest
The first level of the game I wanted to take place above the tree tops. The player would fly through the dark night with the moon as the only light source. The inspiration from this scene I took from Studio Ghibli’s anime movie “Princess Mononoke”. I was fascinated by the way they succeed to create depth in a drawn landscape.
I made sure I was creating a new layer in Photoshop for each layer of tree tops and the moon. When I was satisfied with the result the next step was to make the “beginnings” and “ends” of each layer fit in perfectly in order for the programmers to be able to make it loop. In Photoshop their is a tool for this which I learned from a student in the second grade at the last Game Jam.
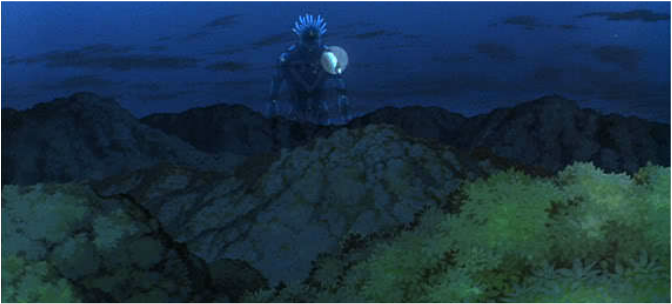
Scene from Studio Ghibli’s anime movie “Princess Mononoke”
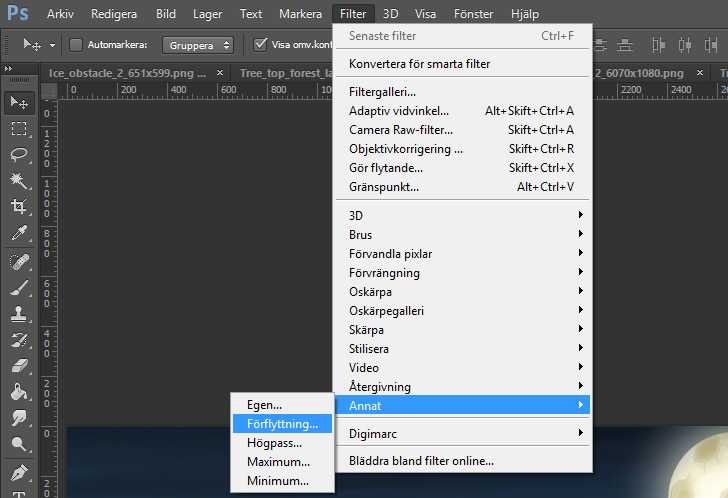
Displacement Tool
Mark the Layer you want to correct. Go to Filter>Other>Offset and select a positive number for the horizontal (for e.g. +500) and press “ok”. If you look at your picture you will notice the layer has scrolled and you will be able to correct the chain in order to able it to loop. When you are finished make sure to go back to Filter>Other>Offset and change your numbers to the same numbers you had before but now change it to negative (-500). This will get your layer back in its original position.
Level 2 – The Forest
The second level environment I created was the forest. First I was going to create one purple colored forest area which would later in the same level change to a blue color scheme to indicate that you were getting closer to the third level which would be a cave. However after finishing working on the blue forest I did not have any time and inspiration enough to create the purple forest. I would have had to make purple themed obstacles and traps which would have been too much effort and time consuming. Luckily my team was satisfied with the blue themed forest so I kept working on it. The different elements in this environment for the parallax where silhouette trees in the forground, silhoutte plants and grass on the middle ground, big detailed rocks, many tall trees in the distance, the sky and the moon. To add abit of life to the environment I also added a stag.
At first I was thinking of making a tree brush but I then decided to paint the trees individually since I do not like the idea of repetive objects. At the end of this level I drew a big cave entrence where the player would fly in and proceed to the final level 3.
|
Click here to view the Image —>
|
|
Level 3 – The CaveWeek 3. we decided to make Level 3 priority no.1 since we think it has potential with its changing environment (not that repetitive as level 1 and 2), trap and enemy possibilities. The other two levels are too empty in comparison to the cave. Possible traps are going to be gayzers, dropping stalactites and cobwebs. As enemies we are planning mosquito swarms and spiders. I am not going to lie, making the cave to a parallax was alot of work for me. I spent several hours drawing the background and adding the muschrooms to the front layer. It is the process that takes the longest time. To come up with the idea and to be able to bring it on the paper. Once the sketch and design is done it is not easy to find fitting colors and keep the harmony through the entire level environment. With help from realistic photos and artistic concept art I ended up with this magic art style cave environment.
Normally a cave is a quiet dark place but I want the player to feel like she is flying through a captivating environment so I drew holes in the background to availiable light to shine through and light up the cave from behind. In order to strengthen the feeling of backlight and the depth I added outlines on the siluette stalagmites and rocks in the forground layer.
Next week I was thinking to talk about the enemies and traps in our game. Stay tuned! 🙂
And remember..
Time is of the essence!
Click here to view the Image —>
|
|
ART GALLERY
About Lisa Wackenhuth Svanström
2014 Graphics
|